March, a time of transformation in the garden, calls for both a retrospective look at the cold season past and a forward-thinking approach as spring knocks at the door. With a harmonious balance of wrapping up your winter garb and welcoming the warmer whispers of spring, March gardening requires a thoughtful mix of activities. This guide will help you seamlessly transition through this pivotal month, ensuring your garden is vibrant and flourishing.
Herbs like rosemary, mint, sage, thyme, basil, and chives make excellent additions to your March planting list. Not only are they hardy and capable of withstanding the still-cool nights, but they can also be conveniently grown in either containers or directly into your garden beds.
March is the perfect month to plant flowering shrubs and perennial herbs, which will establish themselves with the upcoming spring warmth.
March gardening sets the tone for the upcoming growth season, making it an essential period for preparation and careful planning. Whether you're a novice gardener just getting your hands dirty or a green-thumbed veteran, taking these steps will help ensure your garden is set to thrive in the coming abundance of spring. Happy gardening! So, get out there and start preparing for a beautiful and bountiful garden this March. Don't forget to take a moment to appreciate the transformation happening all around you as winter fades away and spring takes its place. Here's to another successful year of gardening! # Happy Gardening!
Additional Tips:
March is a crucial month for gardening, as it sets the stage for the rest of the growing season. With careful planning and attention to key tasks such as planting herbs and shrubs, along with general tips for maintaining a healthy garden, you can ensure a vibrant and flourishing space. Don't forget to enjoy the process and take pride in your efforts as you watch your garden come to life. Happy gardening! # Happy Gardening! So, get out there and start preparing for a beautiful and bountiful garden this March. Don't forget to take a moment to appreciate the transformation happening all around you as winter fades away and spring takes its place. Here's to another successful year of gardening! # Happy Gardening!
]]>The earth awakens from its winter slumber, the days grow longer, and the sun’s gentle warmth starts to kiss the landscape. There's a palpable shift in the air that can only mean one thing for gardening enthusiasts—it's time to plant. Spring planting is both a science and an art, a dance with nature that promises a bounty of color and sustenance. But how do we ensure that our spring endeavors yield the lush, vibrant results we all dream of? Join us as we unearth the tips, tricks, and techniques to craft the perfect spring garden.
The significance of spring in the gardening calendar harks back to the most ancient traditions. Spring equinox marks a celestial event where night and day are equally long, symbolizing the balance needed for new life to flourish. In practical terms, spring is when temperatures start to rise and soils begin to warm, making this the perfect time to sow seeds and plant young plants.
The ideal soil temperature for most plants, especially vegetables, is between 65-75 degrees Fahrenheit. This sweet spot allows for optimal seed germination and robust root development. Before the plants go into the ground, gardeners should check their soil's temperature to determine if conditions are favorable. This can be done using a soil thermometer or online resources that provide local temperature data.
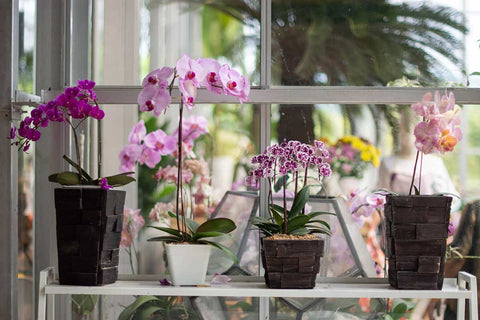
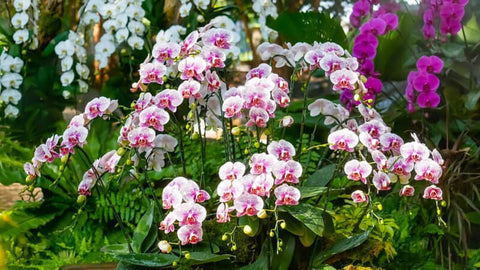
Not all plants are created equal when it comes to planting in spring, some thrive in the cool weather and others are more heat-loving. For the early spring, consider planting radishes, peas, lettuce, and spinach. As the weather warms, transition to sowing beans, corn, cucumbers, and squash, among other warm-season vegetables. Beyond vegetables, spring is also a fantastic time to plant perennials, shrubs, and trees as their roots have time to establish before the heat of summer sets in.
Preparation is key to a successful spring planting season. Here, we'll explore the necessary steps to ensure your garden is primed for planting.
Before any seeds can be sown, the garden must first be freed from winter's detritus. Rake away dead leaves, branches, and any other material that has accumulated over the colder months. This not only prepares the soil but also helps prevent the spread of pests and diseases that may have taken refuge in the garden.
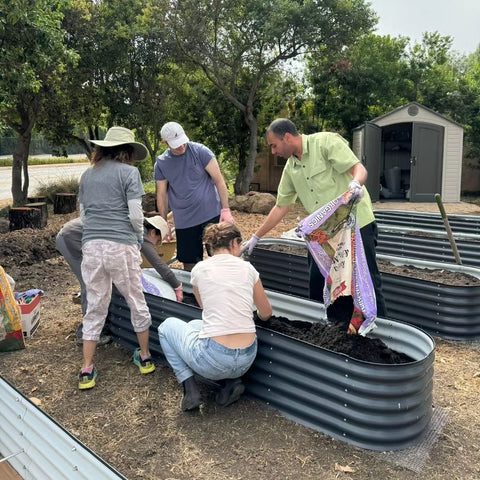
Healthy soil is the foundation of a productive garden. Once cleared, now is the time to amend the soil with organic matter like compost or aged manure. This enriches the soil, improves its structure, and provides essential nutrients to the plants. Remember, a healthy garden starts from the ground up.
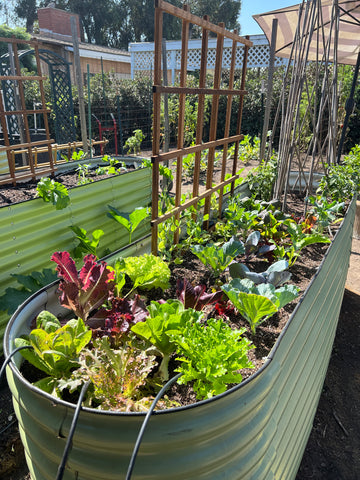
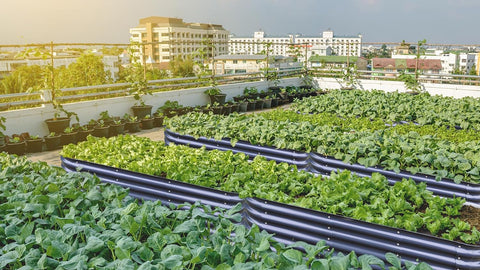
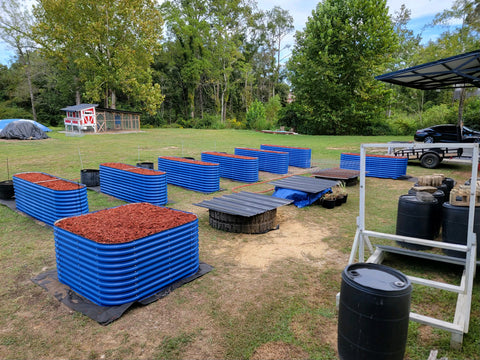
For those with raised beds or turf gardens, it's time to prepare your planting area. Tilling, turning the soil, and breaking up clods help ensure good aeration and drainage. If using raised beds, take stock of the need for additional soil or amendments. Ensure raised beds are level and properly structured to prevent erosion and water logging.
Planting may seem straightforward, but there's an art to it that can make all the difference.
For plants that require a longer growing season, starting seeds indoors can give them a head start. Use peat pots or trays with good drainage, germination mix, and keep them in a warm, well-lit location. Make sure to acclimate seedlings to outdoor conditions gradually before transplanting into the garden.
Timing is critical for transplanting seedlings into your garden. A general rule of thumb is to wait until after the last expected frost date in your region. This can be found on most local gardening calendars and is a key piece of information for successful spring gardening.
When planting, it's important to consider the spacing and depth for each type of plant. Crowding can lead to competition for nutrients and create an environment for pests and diseases to thrive. A planting grid can be helpful for beginners to ensure proper spacing, while planting at the correct depth (as indicated by seed packets or plant labels) sets the stage for healthy root development.
Once your seeds are sown and seedlings transplanted, the real nurturing begins.
Proper watering is crucial, especially in the early stages of growth. Seeds need consistent moisture to germinate, and young plants require gentle watering to establish roots. A soaker hose or drip irrigation system can be beneficial to deliver water directly to the root zone without affecting foliage.
Mulching is a gardener's best friend—it conserves moisture, suppresses weeds, and helps maintain an even soil temperature. Apply a layer of organic mulch around the base of your plants once they're in the ground, ensuring that the mulch doesn't touch the stems directly.
Regular fertilization ensures that your plants have the nutrients they need to thrive. For organic gardens, this might include additional compost throughout the season. Keep an eye out for any signs of stress or disease, and act promptly to address any issues.
After the patience, planning, and care comes the most rewarding part—harvesting your spring bounty.
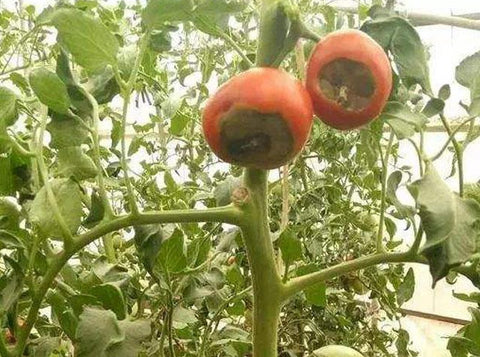
Each plant has its own tell-tale signs that it's ready to harvest. For most vegetables, this includes a certain size or color change. Mark your calendar with estimated harvest dates to prevent produce from becoming overripe.
Use proper harvest techniques to ensure you get the most out of your garden. Snip leafy greens and herbs with scissors, use a sharp knife for larger vegetables, and gently twist root vegetables like carrots or beets to harvest.
Share your garden's successes with friends and family. Celebrate the freshest produce at the dinner table, and if your yield is especially abundant, consider donating to local food banks or participating in community sharing initiatives.
Spring planting is a magical time for gardeners. It's a season of optimism, growth, and the promise of a lush, bountiful garden. By understanding the science behind soil temperatures, preparing your garden with care, and nurturing your plants through to harvest, you are well on your way to a successful spring. Remember, every gardener's experience is unique, and the best teacher is often the garden itself. Enjoy the process, learn from each season, and celebrate the beauty and goodness that spring planting brings.
]]>Your garden's soil is the literal and symbolic bedrock—a foundation upon which success or stagnation is built. Spring is the opportune moment to revitalize this silent worker.
Conduct a simple pH test to fathom your soil's acidity level, a factor pivotal in nutrient absorption. A myriad of home kits make this a breeze—imagine CSI for soil science! Once acquainted with your earthy companion's characteristics, it's time for a makeover. Balancing pH with limestone for acidity or sulfur for alkalinity is akin to soil therapy.
Mulch is your soil's steadfast guardian, insulating it from erratic weather and voracious weeds. It not only retains precious moisture but as it decomposes, it nourishes the soil, weaving a tale of cyclical life that's poem-worthy.
Plants are the art of the garden, each one a brushstroke in a living canvas. Selecting the right plants and nurturing them in their infancy is instrumental to a picturesque season.
Choose your greenery wisely, considering the local climate and soil type. Spring's orchestra includes hardy annuals, delightful perennials, and a retinue of bulbs, each bringing its unique charm to the ensemble.
Pruning is the surgical finesse in the gardener's arsenal, encouraging growth in the right directions. And fertilizing? It's the plant's multivitamin—a nutrient cocktail for vitality. Master these techniques, and your garden will be a spectacle poised for success.
A gardener's nemesis is found in the wriggling forms of pests and the insidious spread of diseases. Defense is often better than treatment, particularly when it's an organic one.
Familiarize yourself with the common foes that might besiege your garden. Ladybugs, for instance, are the vanguard against aphid invasions, while neem oil stands sentinel against fungal fiends.
Preventive care for plants is much like our own—an ounce of consistent watering and an annual check-up with compost should keep your garden robust and disease-free.
With the right notes in place, it's time to compose the symphony of the season.
Plan like a scheduler with a garden-centric Google Calendar. From seed sowing dates to expected blooming windows, foresight saves you from the regrettable chorus of "I should have started that earlier."
Adopt earth-friendly practices, from rainwater harvesting to companion planting. The intent isn't just to grow green but to live it, weaving a tapestry of biodiversity and stewardship into every season.
]]>
As plants grow, they require specific care:
Mound soil around stems to support them against wind in exposed areas.
Thin seedlings when they reach 6 inches in height, leaving 8 to 10 inches between well-established plants.
Use scissors to thin out weaker seedlings, preserving the best in each location.
Side-dress plants with 10-10-10 fertilizer after thinning, lightly watering the fertilizer in.
Harvesting Corn:
Sweet corn is typically ready for harvest about 80 to 95 days after planting, depending on the variety. Each corn stalk should yield at least one large ear. Under favorable conditions, many varieties produce smaller second ears.
Harvest the first ear of corn when the silk extends about 1 to 2 inches beyond the ear tip. This usually occurs 20 to 24 days after silk emergence. Corn is ready when the kernels are plump, the tips blunt, and the husks tightly folded and green. Harvest when the silks wither, and the ear detaches easily at about a 30-degree angle.
Testing for Ripeness:
To test, puncture the kernel's tip with your thumbnail. It should release milky-white juice. If the liquid is clear and watery, the corn needs more time on the stalk.
Picking and Preparing Corn:
To harvest an ear, firmly grasp it, bend it downward, and twist it off with a twisting motion. Break the earstalk without breaking the main stem or tearing the entire husk off.
For the freshest and sweetest corn, immerse the cobs in ice-cold water immediately after picking, keeping them submerged until ready to eat. Consume, process, or refrigerate the ears as soon as possible to preserve their sweetness and freshness.
Lettuce Companion Planting Guide
For optimal lettuce cultivation, follow these companion planting tips:
· Plant lettuce in temperatures between 40 to 85 degrees Fahrenheit.
· Late summer is the best time for lettuce planting.
· Initially, grow lettuce in pots before transplanting to the garden.
· Ensure lettuce receives direct sunlight, like most plants in the Asteraceae family.
· Choose fertile, well-draining soil for lettuce cultivation.
· Plant lettuce seeds at a depth of 1/2 inch for optimal germination.
· Maintain a distance of at least 12-18 inches between lettuce and other vegetables.
· Water lettuce lightly, as it doesn't require excessive moisture for growth.
Unlock the potential of your lettuce crop with thoughtful companion planting. Create a thriving garden ecosystem and enjoy a variety of flavorful, nutrient-rich salads.
Understanding Orchids
Most orchids are found in tropical regions like Asia, South America, and Central America. However, with the exception of the Arctic and Antarctic, orchids grow on every continent.
Orchids can be divided into two main groups:
Epiphytic orchids grow in the air. In the wild, these orchids thrive on trees. They absorb water and nutrients from the air and decaying forest debris.
Terrestrial orchids, as the name suggests, grow in soil.
Varieties of Orchids
With approximately 30,000 species of orchids and over 200,000 hybrid varieties, selecting the right orchid can feel overwhelming for beginners. However, with the correct choice, success is highly achievable.
For beginners, it's advisable to start with orchid varieties that are well-suited to their level of experience. While exploring other varieties is encouraged, especially those native to your region, starting with beginner-friendly options is ideal.
Some beginner-friendly orchid varieties include:
Paphiopedilum: Known as lady's slipper or slipper orchid, this variety is easy to grow and often available in supermarkets and farmer's markets. It produces long-lasting blooms in various colors.
Cymbidium: Also known as boat orchids, they produce large blooms and are less demanding compared to other varieties. Native to Asia, they can tolerate colder temperatures and are suitable for outdoor cultivation in temperate regions.
Phalaenopsis: Commonly known as moth orchids, these orchids are popular among beginners and come in many colors. Despite their delicate appearance, they are robust and thrive indoors with warmth, humidity, and regular feeding.
Oncidium: These orchids, also known as dancing orchids, are reasonably easy to grow and feature swaying flowers reminiscent of dancers. They require five to eight hours of sunlight daily.
Brassavola: Ideal for beginners interested in mounted orchids, this variety is highly fragrant and can also be grown in containers. It's relatively drought-resistant compared to other varieties.
Expanding Outdoors
For beginners, I recommend starting with indoor potted orchids until they become familiar with orchid cultivation complexities. However, outdoor cultivation is possible, particularly in USDA hardiness zones 6 to 9. If temperatures drop below 40ºF, bring the plants indoors. Nonetheless, outdoor cultivation often poses challenges for beginners.
Remember, orchids require dappled sunlight, humidity above 40%, and most varieties need ample watering.
Indoor Orchid Cultivation
Due to my living conditions, I cultivate all my orchids indoors. Extreme summer heat or winter cold makes outdoor growth impractical.
Typically, orchids purchased from retailers or growers come in transparent plastic pots with plenty of drainage holes to ensure adequate airflow and drainage. These pots can then be placed in decorative containers.
Some herbs serve as good companion plants for eggplant. Eggplant prefers herbs with a strong scent. Rosemary emits a pungent scent that will help in deterring colorado potato beetles from eggplant. Rosemary enhances its flavor too.
8. Radish
It takes a professional gardener to use the ‘Trap crop’ method of gardening. Trap crop involves using a companion plant that attracts certain pests similar to your plant as a distraction. Nasturtium flowers are an example of a trap crop. It is used to distract aphids from your eggplant. Another example of a trap crop is Radish. Radishes distract flea beetles from eggplant and attract them to themselves.
9. Oregano
Aphids, cabbage moths, and spiders are major pests that can destroy your eggplant. However, planting flowers or herbs that can deter these pests is your best bet. Some examples of these plants have been mentioned in the previous paragraphs. Oregano releases a scent that keeps these pests at bay. It also invites pollinators and helpful insects.
10. Mints
Mint has a magical effect on humans let alone pests. This herb releases a scent that gets rid of pests. There are varieties of mint plants that pair well with eggplant. They include peppermint and winter mint. Although mint is an invasive herb, its root will have no adverse effect on eggplant. By sprinkling some mint leaves or growing them with eggplant, pests will stay far away from it.
11. Marigold
Marigolds pair well with many crops in the garden. This flower invites pollinators to your Aubergines and releases a pungent smell that keeps pests at bay. Take note that beans must not be found with marigold and eggplant on the same soil because it’s toxic to its growth.
Are eggplants easy to grow?
Eggplant requires high maintenance and some species are difficult to grow. Eggplant is not regarded as an easy-to-grow plant because of the pest it is vulnerable to. Eggplant is susceptible to flea beetles. White eggplant and large oval eggplant are species of eggplant that will not give you too many problems trying to cultivate it.
When you purchase a kit, you also often get extra support from the manufacturer. For example, some companies offer customer service lines that you can call if you have any questions or problems. If you are thinking about installing a greenhouse over your garden beds, a greenhouse kit is definitely worth considering.
Raised bed greenhouse vs. raised bed cover – what is the difference?
Raised bed greenhouses and raised bed covers are both excellent choices for gardening in small spaces.
Raised bed greenhouses are typically made of metal or plastic and feature a clear cover that allows sunlight to reach the plants inside. Raised bed covers, on the other hand, are usually made of fabric or mesh and only cover the top of the raised bed.
Both types of products have their pros and cons, so it’s important to choose the one that’s right for your needs. Raised bed greenhouses are more expensive than raised bed covers, but they offer superior protection from pests and weather extremes. Raised bed covers are less expensive and easier to set up, but they don’t provide as much protection from the elements.
A raised bed greenhouse is typically taller than a raised bed cover, and it has ventilation openings to ensure proper air circulation. A raised bed cover is shorter and does not have ventilation openings. Raised bed greenhouses are typically used to start plants early in the season or to protect sensitive plants from cold weather, while raised bed covers are most often used to protect plants from pests and diseases.
Should I install a greenhouse or a cover over my garden bed?
If you’re looking for a way to protect your garden from the elements, a raised bed greenhouse may be the perfect solution for you. This type of greenhouse is taller than a raised bed cover, features ventilation openings to ensure proper air circulation, and provides superior protection from pests and weather extremes. Raised bed greenhouses are a great choice for gardeners who want to start plants early in the season or protect sensitive plants from cold weather.
If you’re looking for a less expensive option, a raised bed cover may be the better choice for you. This type of cover is shorter than a raised bed greenhouse, does not have ventilation openings, and provides protection from pests and diseases. Raised bed covers are a great choice for gardeners who want to protect their plants from the elements.
Can I put a greenhouse anywhere in my garden?
You can put a greenhouse anywhere in your garden that gets enough sunlight and has enough space. However, there are some areas that are better suited to greenhouse gardening than others.
For example, if you have a particularly shady garden, then putting a greenhouse in a sunny spot will create a microclimate that is perfect for plants that need lots of light. Alternatively, if you live in an area with a very cold climate, then putting your greenhouse near the house can help to keep it warm during the winter months.
Ultimately, it is important to consider both the needs of your plants and the climate of your garden before deciding where to put your greenhouse.
Will a greenhouse protect plants from freezing?
If you’re thinking about setting up a greenhouse, one of your main concerns might be how well it will protect your plants from the cold. After all, you don’t want all your hard work to go to waste when the temperature dips.
The good news is that a greenhouse can provide an ideal environment for keeping plants healthy and happy during the winter months. By trapping heat from the sun, a greenhouse can create a warm and humid environment that is perfect for delicate plants.
In addition, a greenhouse can provide shelter from strong winds and heavy snowfall. As long as you take care to ventilate the space on warm days and provide adequate insulation, your plants should be able to thrive all winter.
Greenhouses can be made out of a variety of materials, including glass, plastic, and even recycled materials like metal food cans. If you have a glass or plastic greenhouse, it will not protect your plants from freezing if the outside temperature gets cold enough.
However, if you have a metal greenhouse, it will help to insulate the inside and keep your plants warmer. In general, the thicker the walls of your greenhouse, the better it will be at keeping your plants warm in the winter.
Will a greenhouse burn my plants?
While it is true that greenhouses can get quite warm, especially on sunny days, this heat is not usually enough to damage most plants. However, there are certain conditions that can make a greenhouse too hot for plants, such as if the temperature inside the greenhouse rises above 100 degrees Fahrenheit.
If this happens, the leaves of plants can start to wilt and they may even suffer from sunburn. To avoid this, make sure to ventilate your greenhouse on hot days and provide shade for plants that are particularly sensitive to heat. With a little care, you can enjoy healthy plants in your greenhouse all summer long.
Why Transplanting Matters:
Transplanting is a crucial aspect of gardening that facilitates the healthy growth of plants. There are several reasons why transplanting is essential:
When to Transplant:
Timing is crucial when it comes to transplanting. While some plants can be transplanted throughout the year, others have specific windows of opportunity. Here are some general guidelines:
How to Transplant Like a Pro:
To guarantee a successful transplant procedure, adhere to following steps:
Conclusion:
Transplanting plants is a valuable skill that empowers gardeners to optimize their green space for health and productivity. By understanding the why, when, and how of transplanting, you can foster a garden that not only survives but thrives. So, put on your gardening gloves, grab your tools, and embark on a journey to give your plants the best possible home for robust growth and vibrant blooms. Happy gardening!
]]>Understanding the Gopher Challenge:
Gophers are known for their extensive tunneling activities, which can disrupt plant roots, damage irrigation systems, and create unsightly mounds of soil. Traditional methods of controlling gophers, such as traps and poisons, may not always be the most environmentally friendly or effective solution. That's where gopher netting comes into play.
The Basics of Gopher Netting:
Gopher netting, also known as gopher wire or gopher mesh, is a specialized type of wire mesh designed to create a barrier between your plants' roots and gophers. This durable material is typically made from galvanized steel or other sturdy metals, providing a long-lasting and reliable defense against these burrowing pests. Gopher netting comes in various sizes and configurations, allowing you to tailor its use to your specific garden needs.
How Gopher Netting Works:
Gopher netting is installed below the soil surface, forming a protective barrier around the root zone of your plants. This physical barrier prevents gophers from digging through the soil and reaching the delicate roots. The mesh size is crucial – it should be small enough to keep gophers out while allowing water, air, and nutrients to pass through. Additionally, gopher netting is flexible and can be cut to fit your garden layout, making it a versatile solution for various garden designs.
Installation Tips:
Prepare the Soil: Before installing gopher netting, loosen the soil to ensure a smooth and even installation. This will also make it easier for plant roots to grow through the mesh.
Lay the Netting: Place the gopher netting in the planting area, ensuring it covers the entire root zone of your plants. Overlap the edges of the mesh to create a seamless barrier.
Secure the Edges: Anchor the edges of the netting by burying them or securing them with landscape staples. This prevents gophers from finding gaps to exploit.
Planting Over the Netting: Once the gopher netting is in place, you can plant your desired vegetation directly above it. The mesh will allow roots to penetrate while protecting them from gophers.
Benefits of Gopher Netting:
Non-Toxic Solution: Unlike chemical treatments, gopher netting provides a chemical-free and environmentally friendly way to protect your garden.
Long-Term Protection: Gopher netting is a durable solution that can last for many seasons, offering consistent protection for your plants.
Versatility: Gopher netting can be used in various garden settings, from raised beds to traditional in-ground plantings.
Preserve Soil Structure: The mesh allows for natural water drainage, maintaining soil structure while keeping gophers at bay.
Conclusion:
In the battle between gardeners and gophers, gopher netting emerges as a reliable ally, providing an effective and environmentally conscious solution. By incorporating this simple yet powerful tool into your gardening arsenal, you can protect your plants from subterranean invaders and ensure a flourishing garden. From tunnels to triumphs, gopher netting is a gardener's key to cultivating a beautiful and pest-free oasis. Happy gardening!
]]>Understanding Blossom End Rot:
Blossom end rot is a physiological disorder caused by a calcium imbalance in the plant. Calcium is essential for cell structure and growth, and when there's a deficiency, the developing tomatoes suffer. Galvanized raised garden bed can exacerbate this issue due to factors such as pH levels and drainage. However, with proper care, you can overcome these challenges and enjoy a flourishing tomato crop.
Tips for Preventing Blossom End Rot in Galvanized Raised garden bed:
Soil Preparation:
Amend the Soil with Organic Matter:
Balanced Fertilization:
Proper Watering Practices:
Mulching:
Use Calcium Supplements:
Proper Spacing:
Monitor for Pests and Diseases:
Conclusion:
Growing tomatoes in galvanized raised garden bed can be a rewarding experience with the right care and attention. By addressing the factors that contribute to blossom end rot, such as soil pH, nutrient balance, and water management, you can enjoy a plentiful harvest of delicious, blemish-free tomatoes. Remember to stay vigilant, implement preventative measures, and enjoy the fruits of your labor in a thriving and productive garden. Happy gardening!
]]>
Marigolds (Tagetes spp.):
Marigolds are not just pretty faces in the garden; they also serve as natural pest repellents, making them a fantastic choice for raised beds. With their warm hues of orange and yellow, marigolds add a touch of summer throughout the growing season.
Zinnias (Zinnia elegans):
Bright and durable blooms are a hallmark of zinnias. Available in a myriad of colors, these cheerful flowers are excellent for attracting butterflies and pollinators to your garden. Their compact size makes them ideal for raised beds, creating a lively display.
Petunias (Petunia spp.):
With their trumpet-shaped flowers and a wide range of colors, petunias are a classic choice for raised bed gardens. These versatile flowers are easy to grow and can cascade beautifully over the edges of the bed, adding a cascading effect.
Snapdragons (Antirrhinum majus):
Snapdragons are known for their unique, dragon-shaped blooms and a variety of colors. Their upright growth habit adds height and structure to your raised bed garden, creating a visually appealing landscape.
Cosmos (Cosmos bipinnatus):
Nasturtiums (Tropaeolum majus):
Nasturtiums are not only visually appealing but also edible, adding a peppery flavor to salads. Their bold, round leaves and vibrant blooms in shades of red, orange, and yellow make them a fantastic choice for both aesthetic and culinary purposes.
Alyssum (Lobularia maritima):
Alyssum is a low-growing, fragrant flower that is perfect for the front edges of raised beds. The sweet scent and tiny clusters of blooms in white, pink, or purple create a charming carpet of color.
Salvia (Salvia splendens):
Also known as scarlet sage, salvia produces striking spikes of tubular flowers in shades of red and purple. These tall, upright plants are excellent for adding vertical interest to your raised garden bed.
Conclusion:
Elevate your gardening experience by incorporating these annual flowers into your raised bed garden. The combination of colors, textures, and fragrances will not only enhance the visual appeal of your outdoor space but also attract beneficial insects, creating a thriving and beautiful ecosystem right outside your doorstep. Experiment with different flower combinations to discover your perfect palette and enjoy a dazzling display throughout the gardening season. Happy gardening!
]]>
Welcome in the Garden:
Not Welcome in the Garden:
Conclusion:
Incorporating four-legged companions into your garden can be a rewarding experience, fostering a deeper connection between nature and your furry friends. By choosing the right pets, selecting pet-friendly plants, creating designated play areas, and addressing potential challenges, you can create a harmonious garden that is both a retreat for you and a paradise for your pets. So, let the paws and blooms coexist, creating a vibrant and lively outdoor space for everyone to enjoy.
]]>
Pros:
Aesthetic Appeal:
Relaxation and Serenity:
Biodiversity and Ecosystem:
Educational Value:
Property Value Enhancement:
Cons:
Maintenance Challenges:
Costs of Installation and Upkeep:
Potential for Overpopulation:
Risk of Predators:
Water Usage and Environmental Impact:
Conclusion:
Incorporating a fish pond into your garden can be a rewarding endeavor, offering numerous benefits for aesthetics, relaxation, and biodiversity. However, it's crucial to weigh these advantages against the potential challenges, including maintenance, costs, and environmental considerations. By carefully considering the pros and cons, you can make an informed decision about whether a fish pond is the right addition to your garden oasis.
]]>
Spring Invaders: Aphids and Caterpillars
As the temperatures rise and your garden awakens from its winter slumber, so do some unwanted guests. Aphids and caterpillars are notorious for causing damage in the spring. Aphids suck the sap from plants, leading to weakened growth, while caterpillars voraciously munch on leaves.
Defense Strategy: Introduce Beneficial Insects
Promote the presence of lacewings, parasitic wasps, and ladybugs as natural predators. Planting companion flowers like marigolds and nasturtiums can also deter aphids. Regularly inspect the undersides of leaves for eggs and caterpillars, removing them by hand or using a mild insecticidal soap.
Summer Heat: Spider Mites and Japanese Beetles
Summer brings its own set of challenges, with spider mites causing stippled leaves and Japanese beetles devouring foliage. Both can quickly become a menace if left unchecked.
Defense Strategy: Water and Neem Oil
Keep your garden adequately hydrated, as spider mites thrive in dry conditions. Regularly spray plants with a strong jet of water to dislodge these tiny pests. For Japanese beetles, neem oil is an effective organic solution. Apply it early in the morning when beetles are less active.
Autumn Troubles: Whiteflies and Cabbage Worms
As the days grow shorter, whiteflies and cabbage worms become more prominent. Whiteflies can transmit diseases, while cabbage worms feast on cruciferous vegetables.
Defense Strategy: Reflective Mulch and Row Covers
Reflective mulch can deter whiteflies by confusing them with the sunlight reflection. Row covers are an excellent barrier against cabbage worms. Additionally, planting diverse crops can disrupt the life cycle of these pests.
Winter Woes: Snails and Slugs
Winter might seem like a respite, but snails and slugs thrive in cool, damp conditions. They can chew through tender seedlings and leave a path of destruction.
Defense Strategy: Beer Traps and Copper Barriers
Set up beer traps by sinking shallow containers filled with beer into the soil. The smell draws slugs, who then drown after falling in. Copper barriers are also effective; the slimy pests receive a mild shock when they come into contact with copper, deterring them from crossing.
Conclusion:
Maintaining a healthy garden involves a proactive approach to pest management. By understanding the life cycles of common pests and implementing targeted strategies throughout the year, you can create a thriving garden while minimizing the impact of unwelcome insect guests. Remember, a balanced ecosystem is key to sustainable and pest-resistant gardening.
]]>Spring: Ladybugs (Lady Beetles) - Nature's Aphid Assassins
As the weather warms up and your garden comes to life in the spring, ladybugs (lady beetles) emerge as one of the most valuable allies for your plants. Ladybugs are voracious predators of aphids, which can quickly infest and damage tender new growth. These charming little beetles also feast on other soft-bodied pests like mealybugs and spider mites. Introduce ladybugs to your raised garden bed early in the season to establish a natural defense against common springtime invaders.
Summer: Braconid Wasps - Tiny Parasitoids with a Big Impact
Summer brings its own set of challenges, with an increase in caterpillars, tomato hornworms, and cabbage loopers. Enter the braconid wasps, a group of tiny parasitoid wasps that target a variety of garden pests. These wasps lay their eggs on or inside caterpillars, effectively controlling their populations. While the idea of wasps may be intimidating, rest assured that braconid wasps are harmless to humans and only pose a threat to garden pests. Encourage their presence by planting nectar-rich flowers such as dill, parsley, or marigolds.
Fall: Ground Beetles - Nocturnal Predators on Patrol
As the growing season winds down and temperatures begin to cool, ground beetles take center stage as guardians of your garden during the fall. These nocturnal predators are adept at hunting down a range of pests, including slugs, snails, and caterpillars. Creating a garden habitat with mulch and leaf litter provides an ideal environment for ground beetles to thrive. With their voracious appetites, these beetles help maintain a healthy balance in your raised garden bed as they patrol through the night.
Winter: Predatory Mites - Cold-Weather Crusaders
While winter may seem like a dormant period for your garden, it's essential to maintain vigilance against overwintering pests. Predatory mites are microscopic heroes that can withstand the cold and actively hunt down pests like spider mites, thrips, and other harmful insects. To support these tiny defenders, avoid using broad-spectrum pesticides that could harm them. Instead, focus on practices that promote biodiversity, such as companion planting and providing shelter for beneficial insects during the winter months.
Conclusion:
A successful raised garden bed is a testament to the delicate dance of nature, where beneficial insects play a crucial role in maintaining balance. By welcoming ladybugs, braconid wasps, ground beetles, and predatory mites throughout the seasons, you can create a resilient and thriving ecosystem that minimizes the need for chemical interventions. Embrace the diversity of the insect world, and let these unsung heroes become the guardians of your garden year-round. Your plants will thank you with a bountiful harvest and a flourishing, pesticide-free environment.
]]>Conclusion:
Creating and maintaining a meadow garden in your backyard is a rewarding venture that not only beautifies your space but also contributes to the health of local ecosystems. By fostering biodiversity and embracing sustainable practices, you can enjoy a vibrant and dynamic meadow right outside your doorstep. So, grab your gardening tools and get ready to sow the seeds of a flourishing meadow garden!
]]>Educational Workshops for Kids:
Youth Gardening Clubs:
Community Garden Open Days:
Neighborhood Workshops for Adults:
Inter-generational Gardening Days:
Seasonal Celebrations:
Create a Community Garden Club:
Conclusion:
Involving kids and neighbors in your community garden program is not just about growing vegetables; it's about cultivating relationships, fostering a love for nature, and building a sustainable community. By implementing these strategies, you can create a vibrant and inclusive garden space that benefits individuals of all ages and strengthens the bonds within your neighborhood. Together, let's sow the seeds of a greener, healthier, and more connected community.
]]>Benefits of Raised garden beding:
Raised garden beding offers numerous advantages for cultivating bulbs, corms, and tubers. The elevated structure provides better drainage, prevents soil compaction, and allows for easier weed control. Additionally, raised beds warm up faster in the spring, creating an ideal environment for early summer bloomers that thrive in well-drained, warm soil.
Choosing the Right Bulbs, Corms & Tubers:
Before diving into the planting process, it's essential to select the right bulbs, corms, and tubers for your raised garden bed. Popular choices for early summer blooms include dahlias, gladiolus, lilies, and begonias. Ensure you choose varieties that are well-suited to your climate and growing conditions.
Steps for Planting Early Summer Bulbs, Corms & Tubers:
Prepare the Soil:
Choose the Right Location:
Planting Depth and Spacing:
Watering:
Mulch and Fertilize:
Staking if Necessary:
Monitor and Enjoy:
Conclusion:
Planting early summer bulbs, corms, and tubers in your raised garden bed is a rewarding endeavor that promises a tapestry of colors and textures. By following these simple steps, you'll be well on your way to creating a vibrant and flourishing garden that will be the envy of your neighborhood. Embrace the beauty of nature as your raised bed bursts into a symphony of early summer blooms!
]]>Winter Garden Observations:
Start your January garden adventure with a mindful stroll. Observe the overall health and appearance of your plants.
Take note of any discolored or withered leaves, unusual growth patterns, or signs of pests.
Check for waterlogged areas that could indicate poor drainage.
Inspecting Soil Health:
Use this time to assess the soil quality. Is it compacted, depleted, or lacking in nutrients?
Consider performing a soil test to determine pH levels and nutrient content.
January is an excellent time to amend the soil with organic matter, such as compost or well-rotted manure.
Pruning and Trimming:
Prune deciduous trees and shrubs to remove dead or damaged branches.
Trim back perennials and ornamental grasses to promote healthy growth in the spring.
Pruning in January helps maintain the shape of the plants and encourages robust flowering later in the year.
Winter Pests and Diseases:
Inspect plants for signs of winter pests, such as aphids or spider mites.
Treat any existing pest problems with environmentally friendly solutions.
Eliminate any unhealthy or dead plant matter to stop infections from spreading.
Protecting Against Frost:
Keep an eye on the weather forecast for frost warnings.
Cover vulnerable plants with frost blankets or burlap to protect them from freezing temperatures.
Mulch protects roots and insulates soil surrounding plant bases.
Planning Ahead:
Use January as a planning month for the upcoming growing season.
Research and order seeds for spring planting.
Plan any garden renovations or expansions, considering crop rotations and companion planting.
Tool Maintenance:
Check and clean your gardening tools. Sharp and well-maintained tools make gardening tasks more efficient.
Inspect hoses and watering equipment for leaks or damage.
Winter Composting:
Continue composting kitchen scraps and garden waste throughout the winter.
Turn the compost pile to facilitate decomposition.
Conclusion:
Embrace the serenity of your winter garden and take advantage of January to identify and address potential issues. By dedicating time to observation, maintenance, and planning, you set the stage for a flourishing garden in the months to come. January isn't a time of dormancy for the avid gardener; it's a season of preparation and anticipation for the vibrant growth that lies just around the corner.
]]>
January is an ideal time to plant cold-hardy vegetables in your raised bed. These plants can withstand chilly temperatures and even a light frost, making them suitable for early planting. Consider sowing seeds for vegetables such as:
● Carrots: Choose varieties like 'Nantes' or 'Danvers' for a sweet and crisp harvest.
● Radishes: Quick to mature, radishes are a fantastic choice for early planting, adding a peppery crunch to your salads.
● Spinach: Varieties like 'Winter Bloomsdale' and 'Tyee' thrive in cooler temperatures and can be harvested as baby greens or mature leaves.
Leafy Greens:
Leafy greens are not only nutritious but also relatively quick to grow. Planting them in January ensures a staggered harvest throughout the spring. Consider sowing seeds for:
● Lettuce: Opt for varieties like 'Butterhead,' 'Romaine,' or 'Leaf' lettuce for a diverse salad mix.
● Kale: Both curly and Lacinato (also known as dinosaur kale) varieties are excellent choices for a nutrient-packed garden.
Herbs:
Fresh herbs can elevate the flavor of your dishes, and many herbs are well-suited for planting in raised beds during January. Try planting seeds for:
● Cilantro: This versatile herb adds a burst of freshness to various cuisines and is easy to grow from seed.
● Parsley: Choose either flat-leaf (Italian) or curly varieties for a continuous harvest.
Root Vegetables:
Root vegetables thrive in the loose, well-draining soil of raised beds. Sow seeds for:
● Beets: Varieties like 'Detroit Dark Red' and 'Chioggia' add color and earthy sweetness to your meals.
● Turnips: Both the roots and greens of turnips are edible, providing a dual harvest from a single planting.
Peas:
Peas are a cool-season crop that can be planted in January for a spring harvest. Choose varieties like 'Sugar Snap' or 'Oregon Sugar Pod' for sweet and crunchy peas.
Seeds to Avoid Planting in January:
a. Warm-Season Crops:
While it's tempting to get a jump on summer favorites like tomatoes, peppers, and cucumbers, it's best to resist the urge in January. These crops thrive in warmer temperatures and may struggle to germinate or establish in the cooler soil of early spring.
b. Tender Annuals:
Seeds of tender annuals, such as marigolds and zinnias, are better off planted closer to the last frost date. Starting them too early may result in leggy seedlings that are more susceptible to cold temperatures.
c. Tropical Plants:
Plants like tropical fruits and exotic flowers should be saved for warmer months or indoor gardening. These plants require consistently warm temperatures and may not survive the cooler conditions of January.
Tips for Successful January Planting:
a. Use Cold Frames or Row Covers:
Provide extra protection to your seeds and seedlings by using cold frames or row covers. These structures help trap heat and create a microclimate that encourages germination and growth.
b. Choose the Right Varieties:
Opt for cold-tolerant and early-maturing varieties of seeds for January planting. Check seed packets for information on ideal planting times and temperature ranges.
c. Monitor Soil Moisture:
Keep an eye on soil moisture levels. While it's essential to keep the soil consistently moist, be cautious not to overwater, as excess moisture can lead to fungal issues.
d. Mulch Around Plants:
Mulching helps regulate soil temperature and moisture levels. Apply a layer of mulch around your seedlings to keep the soil conditions favorable for growth.
Conclusion:
Embarking on a gardening adventure in January can be a rewarding experience, especially when armed with the knowledge of which seeds to plant. By focusing on cold-hardy varieties and employing proper gardening practices, you'll be well on your way to enjoying a vibrant and thriving raised garden bed in the coming months. Happy gardening!