Maintain a Tidy Garden:
Seal Entry Points:
Limit Water Sources:
Use Natural Repellents:
Keep Bird Feeders Away:
Install Snake Fencing:
Encourage Natural Predators:
Conclusion:
Creating a snake-free garden involves a combination of preventive measures that make your outdoor space less appealing to these reptiles. By maintaining a tidy environment, sealing entry points, and using natural deterrents, you can enjoy your garden without worrying about unexpected slithering visitors. With these practical tips, your garden will remain a thriving paradise for you, your family, and the local wildlife.
]]>1.Select the Right Sunflower Varieties:
Before you start planting, choose sunflower varieties that are well-suited for raised garden bed ing. Dwarf or compact sunflower varieties are excellent choices as they won't overshadow other plants and are better equipped to thrive in confined spaces.
2.Choose a Sunny Spot:
As the name suggests, sunflowers love sunlight. Ensure your raised bed receives at least 6 to 8 hours of direct sunlight daily. Position your raised bed where it can bask in the sun, promoting healthy and robust sunflower growth.
3.Prepare the Soil:
Sunflowers prefer well-draining soil with a slightly acidic to neutral pH. Prepare your raised bed by mixing in compost to enhance soil fertility. Loose, rich soil will allow sunflower roots to spread easily, promoting optimal nutrient absorption.
4.Planting Depth and Spacing:
Sow sunflower seeds one to one and a half to two inches deep. Follow the recommended spacing for your chosen sunflower variety to avoid overcrowding. Sufficient distances guarantee appropriate ventilation and lower the likelihood of illnesses.
5.Watering:
Sunflowers are relatively drought-tolerant, but consistent watering is crucial, especially during the germination and early growth stages.Keep the soil in the raised bed constantly moist but not soggy by giving it regular waterings. Once established, sunflowers can tolerate drier conditions.
6.Provide Support for Taller Varieties:
If you've opted for taller sunflower varieties, consider providing support to prevent the stems from bending or breaking. Install stakes or a trellis system in your raised bed to support the growing sunflowers, particularly in areas prone to strong winds.
7.Mulching:
Apply a layer of mulch around the sunflowers to help retain soil moisture, suppress weeds, and regulate soil temperature. Organic mulches, such as straw or shredded leaves, are excellent choices for raised garden beds.
8.Fertilize Wisely:
While sunflowers aren't heavy feeders, providing them with a balanced fertilizer during the growing season can encourage healthier and more robust growth. Follow the package instructions and avoid over-fertilizing, as excessive nutrients can lead to tall, spindly plants.
9.Deadheading:
Deadhead (remove spent flowers) frequently to promote continual blooming. This prevents the plant from directing energy towards seed production, promoting the development of new blooms.
10.Enjoy the Harvest:
As your sunflowers grow and bloom, take the time to appreciate their beauty and the wildlife they attract. Once the flowers have matured, you can harvest the seeds for snacks or leave them for birds to enjoy.
In conclusion, planting sunflowers in a raised garden bed can be a rewarding and visually stunning experience. By following these tips, you'll be well on your way to cultivating a vibrant garden full of these sunny delights. Happy gardening!
]]>Clear Out Debris:
Amend the Soil:
Protect Perennials:
Cover Crop Consideration:
Add a Layer of Mulch:
Protect Against Frost:
Clean and Store Garden Tools:
Plan for the Next Season:
Conclusion:
A little extra care at the end of the gardening season can make a significant difference in the success of your raised garden bed . By following these year-end tips, you'll not only protect your garden during the winter but also set the stage for a thriving and abundant growing season ahead. Happy gardening!
]]>
Embracing the Essence of Winter Seed Saving
1. The Importance of Seed Saving:
Seed saving is a time-honored tradition that involves collecting and storing seeds from plants grown in your garden. Beyond its historical significance, seed saving contributes to biodiversity, fosters self-sufficiency, and helps preserve heirloom and open-pollinated varieties. Winter, with its dormancy and stillness, becomes a critical period for this practice.
2. Winter as a Strategic Seed-Saving Season:
While the garden rests under a winter coat, the seeds within plants mature and dry, reaching their optimal state for harvest. Winter, therefore, serves as a strategic season for seed saving, allowing gardeners to capture the genetic diversity of their plants and prepare for the upcoming growing season.
3. Preserving Genetic Diversity:
Seed saving plays a vital role in preserving the genetic diversity of plants. In a world where commercial agriculture often relies on a limited number of hybrid varieties, saving seeds from your garden helps maintain the genetic richness of heirloom and open-pollinated plants. This diversity contributes to plant resilience, adaptability, and overall ecosystem health.
4. Cost-Effective Gardening:
Beyond its ecological benefits, winter seed saving is a cost-effective approach to gardening. By saving seeds from your own plants, you eliminate the need to purchase new seeds each season. This not only saves money but also fosters a self-sufficient and sustainable gardening ethos.
5. Customizing for Your Garden:
As you save seeds from your garden, you tailor them to your specific growing conditions. Over time, this adaptation results in plants that are better suited to your local climate, soil, and environmental factors. Customizing seeds for your garden creates a harmonious relationship between plants and their surroundings.
Steps to Winter Seed Saving
1. Selecting the Right Plants:
Begin by selecting plants that are well-suited for seed saving. Choose open-pollinated or heirloom varieties, as these plants reliably produce seeds that will yield plants with similar characteristics. Avoid hybrids, as their seeds may not retain the desired traits.
2. Observing Seed Maturity:
To ensure the seeds are mature and viable, observe the plants as they transition from flowering to seed production. Seeds are typically ready for harvest when the seed pods or fruit have dried on the plant. Look for signs of natural dispersal, such as seeds that easily detach or fall from the plant.
3. Harvesting Seeds:
Gently harvest the seeds, taking care to avoid unnecessary damage. For dry seeds, such as those found in pods or fruit, wait until they are fully dry on the plant before harvesting. For seeds in fleshy fruits, remove the seeds from the pulp and clean them thoroughly.
4. Drying and Curing:
Proper drying and curing are essential steps in winter seed saving. Spread the seeds in a single layer on a clean, dry surface, allowing them to air dry thoroughly. Make sure they are completely dry before proceeding to the next step. For some seeds, a curing period may be necessary to enhance germination.
5. Storing Seeds:
After drying, place the seeds in sealed containers, such as glass jars or seed envelopes. Label each container with the plant's name, the date of harvest, and any additional information, such as specific varieties or characteristics. To preserve the seeds' vitality, store them in a cold, dark place.
6. Performing Germination Tests:
Before the next planting season, perform germination tests on a small sample of the saved seeds. This ensures that the seeds are still viable and will germinate successfully. If the germination rate is high, you can confidently use the seeds for the upcoming growing season.
Winter Seed Saving Tips
1. Isolate Varieties:
To maintain the purity of specific plant varieties, consider isolating plants of the same species to prevent cross-pollination. This is especially crucial for plants that are wind or insect-pollinated.
2. Record-Keeping:
Maintain detailed records of your seed-saving efforts. Keep notes on the plants, their characteristics, and any observations you make throughout the growing season. This information becomes invaluable for future gardening endeavors.
3. Consideration for Biennials:
Certain plants, such as biennials, require a two-year growth cycle to produce seeds. Understanding the life cycle of these plants is essential for successful seed saving.
4. Community Seed Exchanges:
Participate in community seed exchanges or seed banks to diversify your seed collection. Exchanging seeds with other gardeners not only adds variety to your garden but also fosters a sense of community and shared knowledge.
Conclusion: Nurturing a Garden's Legacy
As winter wraps its icy embrace around the garden, the practice of winter seed saving emerges as a nurturing and essential endeavor. Beyond the practical benefits of preserving genetic diversity and fostering self-sufficiency, seed saving is an act of stewardship, a way to honor the interconnectedness of plants and the cycles of nature.
In the quiet months of winter, as the garden sleeps beneath the snow, seeds quietly carry the promise of renewal. Winter seed saving is not just a practical skill; it is a celebration of resilience, continuity, and the timeless dance between nature and the gardener. As you embark on this journey of preservation, remember that each seed holds not just the potential for a future plant but a living legacy of the garden's journey through seasons past and those yet to unfold.
Why Choose Raised garden beds?
Improved Drainage:
Raised garden beds provide excellent drainage, preventing waterlogged soil and root rot. Sunflowers thrive in well-draining soil, making Raised garden beds an ideal choice.
Better Soil Control:
You have complete control over the soil composition in Raised garden beds. Sunflowers prefer slightly acidic to neutral soil with good fertility. Customizing the soil to meet these preferences can lead to healthier plants and better yields.
Weed Suppression:
Raised garden beds help in minimizing weed growth, giving your sunflowers a competitive edge for nutrients and sunlight.
Extended Growing Season:
The soil in Raised garden beds warms up faster in the spring, allowing for an earlier start to the growing season. This is particularly beneficial for sunflowers, which thrive in warm conditions.
Choosing the Right Sunflower Varieties:
Dwarf Sunflowers:
Perfect for smaller Raised garden beds, dwarf sunflowers bring the iconic look in a more compact form. Consider varieties like 'Sunflower Sunbelievable' or 'Suntastic Yellow.'
Giant Sunflowers:
If you have the space and want to make a bold statement, go for giant sunflowers like 'Russian Giant' or 'Mammoth.' The height of these varieties pairs well with trellis arches.
Utilizing Trellis Arches:
Enhanced Support:
Trellis arches provide sturdy support for sunflowers, especially the taller varieties. This prevents the plants from bending or breaking under their own weight.
Aesthetic Appeal:
The arches add a vertical element to your garden, creating a visually stunning display. As sunflowers grow towards the sunlight, the arches enhance their natural upward growth.
Space Optimization:
When space is limited, trellis arches allow you to grow sunflowers vertically, maximizing the use of your raised bed area.
Tips for Successful Growth:
Proper Spacing:
Follow the recommended spacing guidelines for the specific sunflower variety you choose. This ensures each plant receives adequate sunlight and nutrients.
Mulching:
Apply a layer of organic mulch around the base of the sunflowers to retain moisture, suppress weeds, and regulate soil temperature.
Regular Watering:
Sunflowers need consistent moisture, especially during the flowering stage. Water deeply and regularly, ensuring the soil is evenly moist but not waterlogged.
Fertilization:
Incorporate a balanced fertilizer into the soil before planting and follow up with additional feedings during the growing season to promote healthy growth and robust blooms.
Conclusion:
Growing sunflowers in Raised garden beds with trellis arches is a creative and practical way to bring the beauty of these radiant blooms to your garden. With the right care and attention, you can create a sunflower sanctuary that not only adds visual appeal but also maximizes space and promotes healthy plant growth. So, roll up your sleeves, prepare your Raised garden beds, and let the sunshine in with a stunning sunflower display!
Use Reclaimed Materials
One of the first steps to making your garden beds garden eco-friendly is to choose sustainable materials for construction. Opt for reclaimed or repurposed wood, bricks, or stones instead of purchasing new materials. This reduces the demand for new resources and helps minimize your carbon footprint.
Build Upcycled Bed Edging
In addition to using reclaimed materials for the bed itself, consider upcycling old items to create unique bed edging. Old tires, broken ceramics, or even discarded pallets can be transformed into eye-catching and eco-friendly garden borders.
Employ No-Dig Gardening Techniques
Traditional gardening often involves tilling and turning the soil, which can disrupt the natural ecosystem and release carbon stored in the soil. In a garden beds garden, you can practice no-dig gardening techniques. Add layers of compost, mulch, and organic matter on top of the existing soil to create a healthy and fertile environment for your plants without disturbing the earth beneath.
Choose Native and Drought-Tolerant Plants
Selecting the right plants for your garden beds is essential for an eco-friendly garden. Native plants are well-suited to your region and require less water and maintenance. Drought-tolerant varieties can thrive with minimal irrigation, reducing water waste and conserving resources.
Companion Planting
Companion planting is an ancient gardening technique that involves growing certain plants together to enhance growth, deter pests, and increase yield. By strategically choosing plant combinations, you can reduce the need for chemical pesticides and fertilizers, making your garden more eco-friendly.
Attract Beneficial Insects
Encourage beneficial insects like ladybugs, lacewings, and pollinators to visit your garden by planting flowers, herbs, and shrubs that attract them. These insects help control garden pests naturally, reducing the need for harmful chemical pesticides.
Collect Rainwater
Rainwater harvesting is an eco-friendly practice that can help you conserve water and reduce your utility bills. Install a rain barrel or a more elaborate rainwater collection system to capture and store rainwater for your garden's irrigation needs.
Create a Compost System
Composting kitchen scraps and garden waste can significantly reduce your environmental impact. Invest in a compost bin or create your compost pile within or near your garden beds garden. The nutrient-rich compost you produce will enrich your soil naturally and reduce the need for synthetic fertilizers.
Mulch Effectively
Mulch aids in temperature regulation, weed control, and moisture retention in the soil. Opt for organic mulch, such as straw or wood chips, to cover the soil surface in your garden bedss. This will reduce water evaporation and decrease the need for excessive watering.
Maintain Healthy Soil
A healthy garden starts with healthy soil. Regularly test your soil to ensure it has the right pH and nutrient balance. Add organic matter like compost and cover crops to enhance soil fertility and structure.
Conclusion
Your garden beds garden can be a source of fresh, organic produce while also contributing positively to the environment. By implementing these little-known tips and tricks, you can make your garden beds garden more eco-friendly, reducing your carbon footprint and promoting sustainable gardening practices. As you enjoy the fruits of your labor, you can also take pride in the knowledge that you are doing your part to protect our planet and preserve it for future generations.
]]>Benefits of Composting
First, let's understand why composting diseased plants can be beneficial. Composting plant waste reduces landfill waste and lessens the environmental burden. Furthermore, composting generates organic fertilizers that can improve soil quality and aid in plant growth. However, when composting plant waste, some extra considerations should be taken to prevent the disease from spreading.
Precautions
When composting diseased plants, the key is to take appropriate precautions to prevent disease transmission. Separating diseased plants, properly treating them, maintaining suitable composting conditions, and using mature compost are essential steps to ensure safe composting. By following these measures, you can transform diseased plants into organic fertilizers while reducing the risk of disease spread, promoting environmental sustainability, and enhancing plant health.
]]>Key Points
Raised garden beds allow you to control soil composition, achieving optimal potato growth in well-draining soil with ample compost.
Weed problems are minimized in Raised garden beds due to the use of barriers, resulting in healthier potato plants with less competition.
Harvesting potatoes from Raised garden beds is easier on your knees and back, thanks to the raised height providing better access to the plants.
Raised garden beds eliminate many common potato growing issues, allowing you to yield a bountiful crop of these delicious tubers. Follow these six tips, and you'll be planting potatoes on Raised garden beds in no time!
Benefits of Raised garden beds Gardening
Your natural garden soil may contain too much clay, sand, or rocks, but Raised garden beds solve this issue. Since you can choose the soil in your Raised garden beds, you have control over the proportions of sand, clay, and any amendments, manure, and compost in the soil. This control is valuable when growing potatoes because they prefer well-draining soil and plenty of compost. Raised garden beds also reduce soil compaction, allowing roots to penetrate deeply.
Weeds are not a problem in Raised garden beds because when you create the bed, you typically lay down a base layer of cardboard or gardening plastic. This barrier prevents weed seeds in the soil from taking root, leading to healthier potato plants with less competition. This results in one of the significant benefits of Raised garden beds: how easy they are on your knees and back! You won't have to bend over to weed, making it easier to pull them out once they sprout. It's also helpful during harvesting because the garden elevates your plants off the ground for easier access.
Setting Up a Raised garden beds Garden
Properly setting up a raised garden bed is essential before planting potatoes. Choose a location that receives at least six hours of sunlight daily. Fill your bed with well-draining, fertile soil and some compost to nourish your potatoes throughout the growing season. Clear the area of weeds before planting.
You can use various materials to construct Raised garden beds, including untreated wood, stones, rocks, cinder blocks, concrete, and bricks. Treated wood is now considered safe to use because the levels of rot-resistant chemicals leaching into the soil are minimal, according to the EPA. Stay away from any pallets with an unknown history as they may have been treated with unsafe chemicals.
Avoid building Raised garden beds wider than 4 feet. You need to reach from one side to the other without stepping into the bed. Since potatoes require at least 12 to 18 inches of planting space, ensure your Raised garden beds is at least one foot deep, but the deeper you go, the larger your harvest.
Best Potato Varieties for Raised garden beds
When it comes to varieties that perform well on Raised garden beds, look for compact plants. All fingerling varieties do well on Raised garden beds because potatoes are small, and the plants take up less space. Early-season varieties also do well on Raised garden beds.
Irish Cobbler: An early-season variety producing medium-sized, square-shaped potatoes, excellent for mashing, baking, and boiling.
Banana: A late-season fingerling potato that produces an abundance of small, yellow-skinned potatoes. Banana fingerlings have waxy skin, making them a perfect addition to salads.
Norkotah: A red-skinned, good-storing potato that matures early in the season.
Planting and Hilling Potatoes
Potato plants grow large, with most of their growth below the soil. When planting seed potatoes, space them about 16 inches apart for early varieties. This allows the roots enough space to spread.
To start planting, dig holes about 6 inches deep. Since you're growing in Raised garden beds, this will place your potatoes in the bottom half of the bed. Place the seed potatoes in the furrow with the "eyes" facing up and cover them with 4 inches of soil.
When the plants reach a height of 6 inches, add soil so that only the top few leaves of the plant are visible. This process is called hilling, as you're creating a hill-shaped mound of soil for the tubers to grow in. Hilling ensures that the growing tubers are not exposed to sunlight, which can produce a toxic bitter substance called solanine and make the potatoes turn green; these potatoes are not suitable for consumption.
Watering Potatoes
Potatoes require a moderate amount of water. Too much, and the growing tubers may rot; too little, and you'll hinder plant growth. This is why using well-draining soil in your Raised garden beds is crucial. Potatoes need about one to two inches of water per week. If you live in a dry climate, you may need to water your growing plants every three to four days to keep them adequately hydrated. Planting in Raised garden beds makes your plants more likely to be under-watered rather than over-watered, as the soil in Raised garden beds tends to dry out faster than in-ground garden beds.
Potatoes prefer deep watering. Keep the flow of water at the root level of the plants and avoid overhead watering as much as possible to reduce the chance of soil-borne diseases. If you must use a sprinkler in the morning, so the sunlight can help evaporate excess moisture from the potato leaves.
Harvesting Potatoes
There are two main times to dig up your potatoes: when the plants first flower early in the season and when the plants die at the end of the season. Early potatoes have a growth period of 60 to 80 days and are typically ready for harvest before mid-summer, while late potatoes are harvested 100 days or more after planting.
If harvesting early potatoes, carefully dig them up. The skin on new potatoes is thin and easily damaged. Early potatoes are usually small, and you should use them promptly.
You can also harvest potatoes a few weeks after the plant's leaves turn yellow and die. Leave the potatoes on the Raised garden beds for a few weeks, allowing their skins to thicken and harden. When harvesting, gently dig at the base of the plant with a garden fork until the attached tubers are unearthed. Fortunately, this is easier to do in Raised garden beds because you don't have to bend over as far!
]]>Summer gardens provide plenty of gorgeous, colorful flowers, delicious vegetables, and refreshing fruits, but there's beauty to be found in the autumn garden as well. As the air turns cooler and summer blooms fade, it's time to consider transitioning your summer garden to autumn. Many plants thrive in the fall, whether it's the cool greens, tasty roots, or warm-hued blossoms.
Learn how to determine when to transition your summer garden to autumn and all the best tips for turning your summer oasis into the autumn garden of your dreams.
When to Transition to an Autumn Garden
While cool evening breezes may start to creep into your garden, the warmth of summer still fills the daytime air. So, when is the best time to transition your garden from summer to autumn? As a general rule, start the transition after the first frost. The decline of summer annual plants is another sign that it's time for a change.
Keep an eye on the weather forecast and avoid preparing for your autumn garden too early! Otherwise, your new plants might not thrive in the warm temperatures. It's typically best to begin this transition around the end of September, but this may vary depending on your location. Just stay tuned, as autumn has its sneaky ways!
Regardless of when you start the transition, planning is crucial. For example, order perennial plants, shrubs, and trees that you'll plant around late August or early September. Also, make sure you have all the right tools for cleaning up your garden.
Tools You'll Need
Once the cooler weather sets in, it's time to transition to your autumn garden, and you'll need some different tools:
Gardening gloves
Shovel or hand trowel
Garden fork
Garden hoe
Compost or a collection bin
Bleach
Fresh soil
Compost
Mulch
Autumn plants
Sprayer or hose
Transitioning Your Summer Garden to an Autumn Garden
Here's a step-by-step guide on how to transition your summer garden to an autumn garden:
Step 1: Clear Out the Old Garden
Before planting your fall favorites, clearing out the old garden is the first step to a seamless transition. Remove all used crops, including summer vegetables and dead annual plants. Additionally, harvest any mature fruits and vegetables from plants nearing the end of their life cycle. Don't forget to deadhead and trim back any used perennial plants to prepare them for winter. Gardening gloves, a shovel, and a garden fork will make removing roots and dead plants easier.
Place any old plants into a compost bin, but be vigilant for signs of disease. If you notice any signs of disease on the plants, such as black spots, withered leaves, or yellowing, dispose of them outside of the compost. Avoid putting weeds in the compost as they can easily spread; instead, dispose of them by burning, putting them in bags, or even making compost piles specifically for them!
Additionally, take apart old trellises and bring them indoors for the winter. Clean them with a bleach solution of 2 parts water to 1 part bleach and soak them for a few hours or overnight. Also, soak your pots overnight to prepare them for new plants.
Step 2: Prepare Garden Beds
After cleaning up the garden, it's time to prepare garden beds and pots. First, test the soil pH to determine any nutrient deficiencies. Then, supplement the soil with compost or fertilizer to ensure your autumn plants have enough nutrients to thrive throughout the season. To prevent the spread of diseases or pests, clean your pots with a bleach solution of 1 part bleach to 10 parts water, soak them for a few hours or overnight, and prepare the pots for new plants.
Step 3: Choose Your Plants
Now that the garden is cleared and ready, replace your summer annuals with plants that thrive in the fall. Plant beautiful flowers and vegetables based on your preferences (or a mix of both!). In general, you'll find that short-season crops that enjoy cooler weather are the top choice for autumn. Select cold-hardy flowers like chrysanthemums and marigolds, leafy vegetables like spinach and lettuce, and root crops like carrots and radishes.
Typically, start planting local trees, shrubs, and perennial plants in September. Check the weather forecast before planting—although there are still six weeks of mild weather, the soil remains warm enough for transplanting, allowing your perennial plants time to establish roots and adapt to their new locations in the yard. Remember that all plants have different preferences and requirements, so do your research on the best planting times!
Wait until after the first frost to reseed your lawn to ensure that the seeds won't start germinating before the warmth returns in spring. September is also an ideal time for dividing spring-blooming perennial plants.
Step 4: Maintenance
When caring for your autumn garden, the rules are similar to summer maintenance. First, keep the soil moist to help new transplants and seedlings develop strong, healthy roots. Additionally, control weeds through regular maintenance, including manual weeding, weed control products, and adding garden edges, as they can steal the nutrients needed for your plants to thrive.
In taking care of your autumn garden, the rules are similar to summer maintenance. First, keep the soil moist to help new transplants and seedlings develop strong, healthy roots. Additionally, control weeds through regular maintenance, including manual weeding, using weed control products, and adding garden edging, as they can steal the nutrients needed for your garden to thrive.
]]>1. Build Your Own Raised garden beds
One of the biggest expenses in gardening can be the cost of raised garden beds themselves. However, with a little DIY spirit, you can significantly reduce this expense. Building your own raised garden beds is a budget-friendly alternative that allows you to customize the size and materials to suit your needs. You can use reclaimed wood, concrete blocks, or even repurposed materials to construct your raised garden beds.
2. Recycle and Repurpose
Look around your home and garden for items you can repurpose for your raised bed garden. Old wooden pallets can be deconstructed to create raised bed frames, and large containers like old bathtubs or wine barrels can be used as unique and cost-effective raised bed alternatives. By recycling and repurposing materials, you can save a considerable amount of money.
3. Choose Affordable Soil Mixes
Instead of splurging on expensive bags of topsoil and compost, consider making your own soil mix. A basic soil blend of garden soil, compost, and organic matter can be both effective and budget-friendly. You can even add in your own compost from kitchen scraps to enrich the soil further.
4. Start from Seeds
Purchasing mature plants can be more costly than starting your garden from seeds. Seeds are generally much more affordable and provide the satisfaction of watching your plants grow from the very beginning. Plus, you can choose from a wider variety of plant species when you opt for seeds, giving you more control over your garden's budget.
5. Companion Planting
Companion planting is an excellent way to maximize your garden's efficiency and reduce costs. Certain plants, when planted together, can provide mutual benefits such as pest control and improved growth. By carefully planning your garden layout with companion planting in mind, you can save money on pesticides and fertilizers.
6. Mulch and Compost
Using mulch and compost in your raised bed garden can help retain moisture, improve soil quality, and reduce the need for expensive fertilizers. Grass clippings, leaves, and kitchen scraps can all be turned into nutrient-rich compost, while mulch helps keep the soil cool and prevents weeds from taking over.
7. Buy in Bulk
If you do need to purchase gardening supplies like seeds, tools, or fertilizer, consider buying in bulk or looking for deals at local garden centers or online. Purchasing larger quantities often results in significant savings in the long run.
8. Water Efficiently
Save money on your water bill by using efficient watering practices. Invest in a soaker hose or drip irrigation system to ensure that water is delivered directly to the root zone, reducing waste. Additionally, collect rainwater in barrels to use for irrigation during dry spells.
9. Learn and Experiment
Gardening is a journey of learning and experimentation. Take the time to educate yourself about the specific needs of the plants you're growing and adapt your gardening practices accordingly. Avoid over-fertilizing or overwatering, which can lead to unnecessary expenses.
10. Embrace Patience
Lastly, remember that gardening is a long-term investment. It may take a season or two to see the full benefits of your efforts. Be patient and enjoy the process of nurturing your garden while keeping an eye on your budget.
Conclusion
Gardening on a budget with raised garden beds is not only possible but also highly rewarding. By following these tips and embracing a frugal mindset, you can create a thriving garden that won't drain your wallet. Whether you're a seasoned gardener or a beginner, raised bed gardening can be an excellent choice for those looking to grow beautiful and budget-friendly gardens. Happy gardening!
Natural Irrigation:
Storms bring much-needed rain, acting as nature's irrigation system. This replenishes the soil with essential nutrients and helps plants thrive. The water from storms is often more beneficial than artificial irrigation methods, providing a perfect balance of minerals.
Temperature Regulation:
Storms can regulate temperatures in the garden. On hot summer days, a sudden downpour cools the atmosphere, preventing plants from wilting. Conversely, storms can also offer warmth during colder seasons, protecting plants from frost.
Seed Dispersal:
Wind associated with storms aids in seed dispersal. This natural process contributes to the renewal and diversification of plant species in the garden. Some seeds are adapted to be spread by wind, ensuring the garden's continuous growth and evolution.
Pest Control:
Rainstorms wash away pests that may have infested plants. Additionally, the disturbance caused by the storm can deter certain insects and animals, acting as a natural form of pest control without the need for chemical interventions.
Soil Erosion:
Intense storms can lead to soil erosion, washing away the fertile top layer of soil. This not only depletes the garden of nutrients but can also expose plant roots, making them susceptible to damage. Implementing proper drainage systems can mitigate this risk.
Flood Damage:
Excessive rainfall can lead to flooding, causing damage to plants and their root systems. Prolonged waterlogging can lead to root rot, a common issue in waterlogged soils. Raised garden beds and well-designed drainage can help prevent such problems.
Structural Damage:
Strong winds accompanying storms can cause structural damage to garden features, such as trellises, fences, and even larger plants. Staking and securing vulnerable structures beforehand can minimize this risk.
Disease Spread:
Moist conditions post-storm create a breeding ground for various plant diseases, including fungi and molds. Adequate spacing between plants, proper pruning, and good air circulation can help prevent the spread of diseases in the aftermath of a storm.
In the dance between storms and gardens, there exists a delicate equilibrium. While storms can present challenges, they also bring forth opportunities for growth and rejuvenation. By understanding and preparing for both the advantages and disadvantages, gardeners can harness the power of nature to cultivate resilient, thriving havens that weather the tempests of the seasons. After all, in the garden, as in life, it's often in the face of challenges that true beauty and strength emerge.
Safety First: Assessing the Damage
Before diving into restoration efforts, prioritize safety. Inspect your garden for any potential hazards such as fallen branches, unstable structures, or electrical issues. Ensure that the area is secure before proceeding.
Clearing Debris: A Clean Canvas
Start by removing debris scattered across the garden. Fallen branches, leaves, and other detritus can hinder the recovery process. This step not only enhances the aesthetic appeal of your garden but also facilitates the identification of damaged plants and structures.
Inspecting Plants: Triaging the Wounded
Examine each plant carefully to assess the extent of damage. Remove any broken or dead branches, but refrain from pruning excessively. Plants often exhibit resilience and may recover with time. Be patient, and focus on fostering a supportive environment for their rehabilitation.
Soil Assessment: Nourishing the Foundation
Storms can disturb the soil structure, potentially affecting the nutrient balance. Conduct a soil test to determine any deficiencies and amend accordingly. Add organic matter such as compost to enhance soil fertility and promote healthy plant growth.
Replanting and Mulching: Rebuilding the Landscape
If some plants are irreversibly damaged, consider replanting with resilient varieties suited to your region. Apply a layer of mulch to conserve moisture, suppress weeds, and protect the soil from erosion. Mulching also aids in temperature regulation, creating a conducive environment for plant recovery.
Watering Wisely: Hydration Without Drowning
Proper hydration is crucial, especially after a storm. However, strike a balance—avoid overwatering, which can lead to root rot. Track the moisture levels in the soil and adjust watering as necessary. Container plants may require more frequent attention.
Fertilizing Strategically: Boosting Growth
Supplemental fertilization can provide a nutrient boost to aid recovery. Choose a balanced fertilizer and apply it according to the specific needs of your plants. However, avoid excessive fertilization, as this can stress plants further.
Structural Repairs: Restoring Hardscape Elements
If your garden features structures like trellises, fences, or statues, inspect them for damage. Repair or replace any broken or compromised elements to ensure the garden's structural integrity.
Conclusion:
While the aftermath of a storm may seem disheartening, the resilience of nature and strategic post-storm care can rejuvenate your garden. Remember, patience is key, and with time, your garden will once again flourish, providing a tranquil haven for you to enjoy.
]]>Part 1: Trellis Makeovers
Cleaning and Repairing: Before you start with the makeover, inspect your trellis for any damage or wear and tear. Fix any broken or loose parts and give it a thorough cleaning. A fresh coat of paint or stain can do wonders to rejuvenate its appearance.
Choose a Style: Decide on the style you want to achieve with your trellis. Whether it's rustic, modern, or something in between, your trellis can set the tone for your outdoor space. You can even consider incorporating decorative elements like arches or lattice patterns.
Color Matters: The color of your trellis can significantly impact your outdoor space. Lighter colors can make your space feel more open and airy, while darker shades can create a cozy and intimate atmosphere. Pick a hue that goes well with your overall design.
Accessorize: Don't forget to add some decorative elements to your trellis. Hanging baskets, lanterns, or outdoor artwork can add charm and personality. Consider incorporating these elements to make your trellis stand out.
Part 2: Choosing the Right Plants
Now that your trellis looks stunning, it's time to select the perfect plants to adorn it. Here are some excellent choices:
Climbing Roses: For timeless elegance and a touch of romance, climbing roses are hard to beat. They come in various colors and can add fragrance to your outdoor space. Ensure good air circulation and provide proper support for their growth.
Clematis: With their striking, star-shaped blooms, clematis vines are a favorite among gardeners. They come in a variety of colors and sizes, making them versatile for any trellis design.
Wisteria: If you're looking for a dramatic and picturesque display, wisteria's cascading clusters of flowers can be breathtaking. However, wisteria can be aggressive, so prune it regularly to maintain control.
Honeysuckle: Honeysuckle vines offer sweetly scented, trumpet-shaped flowers that attract hummingbirds and butterflies. They are a lovely addition to trellises and arches, and their vibrant colors can brighten up your outdoor space.
Jasmine: The fragrant blossoms of jasmine vines can fill your outdoor area with an enchanting aroma. Choose a sunny spot for these vines and watch them flourish.
Climbing Hydrangea: With its large, lush foliage and beautiful blooms, climbing hydrangea is an excellent choice for a trellis. It thrives in partial shade and can provide a more relaxed, cottage garden look.
Climbing Plants for Shade: If your trellis is in a shaded area, consider planting climbing plants like ivy, ferns, or Virginia creeper. These plants thrive in low-light conditions and can create a lush, green backdrop.
A trellis makeover can breathe new life into your outdoor space, turning it into a stylish and inviting retreat. By carefully selecting the right plants to adorn your trellis, you can enhance its beauty and create a harmonious connection with the natural world. Whether you prefer the classic charm of climbing roses or the exotic allure of wisteria, your trellis can become a focal point that transforms your outdoor area into a captivating oasis. So, get ready to roll up your sleeves, pick your plants, and embark on a trellis makeover adventure that will revitalize your outdoor space with style and grace.
]]>Accessibility and Ergonomics
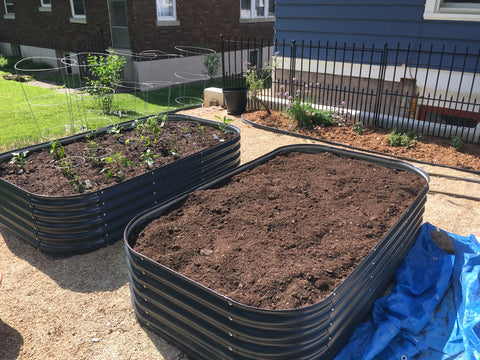
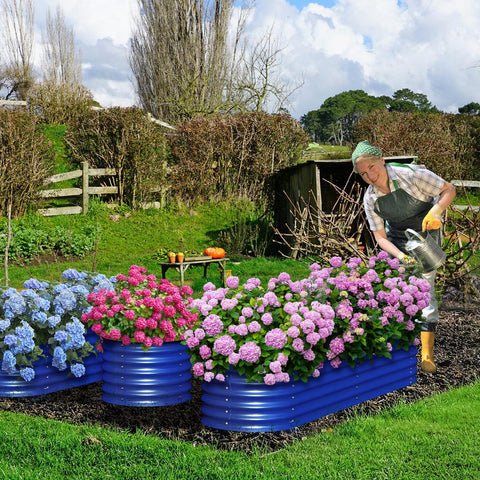
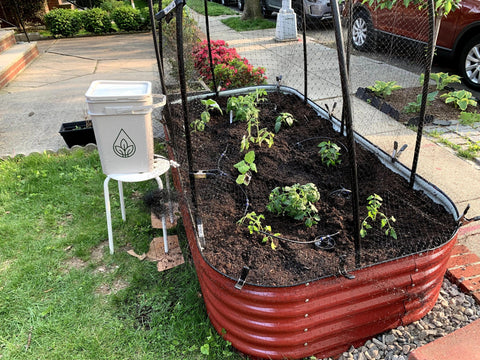
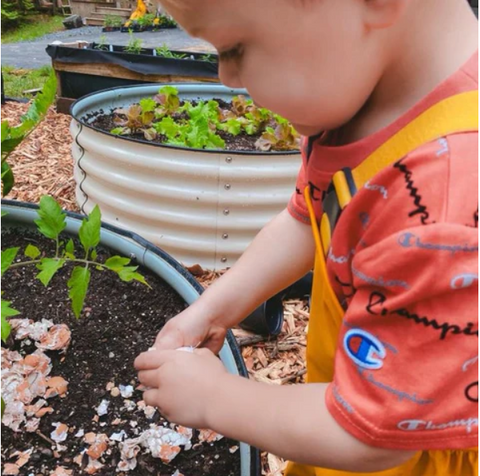
Garden paths lined with raised beds provide a practical solution for those who may struggle with traditional ground-level gardening. Raised beds elevate the soil, reducing the need for bending, kneeling, or stooping. This accessibility makes gardening more inclusive, regardless of age or physical ability. Gardeners with mobility issues can now enjoy the therapeutic benefits of gardening without discomfort.
Improved Drainage and Soil Quality
One of the key advantages of raised beds is the control they provide over soil quality and drainage. By elevating the planting area, you can ensure that your garden soil drains properly, preventing waterlogged roots and soil erosion. Additionally, you have greater control over the composition of the soil, allowing you to customize it to suit the specific needs of your plants. This results in healthier, more productive gardens.
Extended Growing Seasons
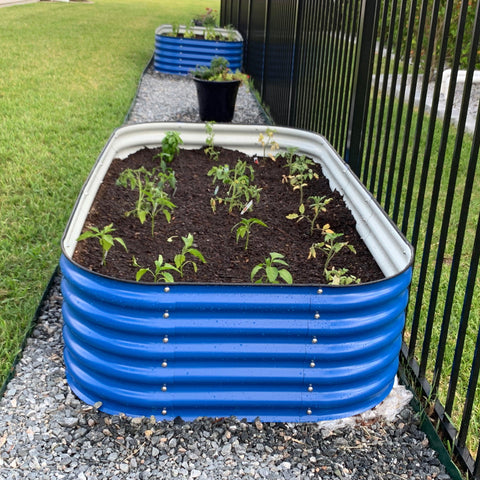
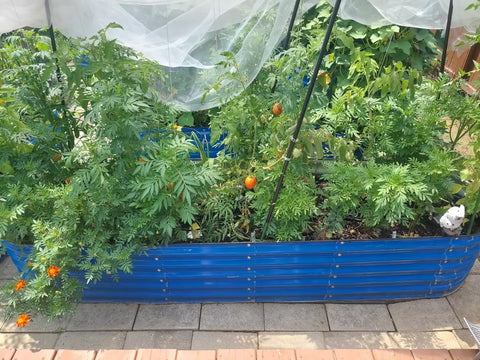
Raised beds tend to warm up faster in the spring, allowing you to start planting earlier in the season. This extended growing season means you can enjoy fresh produce sooner and for a longer duration. It's a fantastic advantage for gardeners in regions with shorter growing seasons or unpredictable weather patterns.
Weed and Pest Management
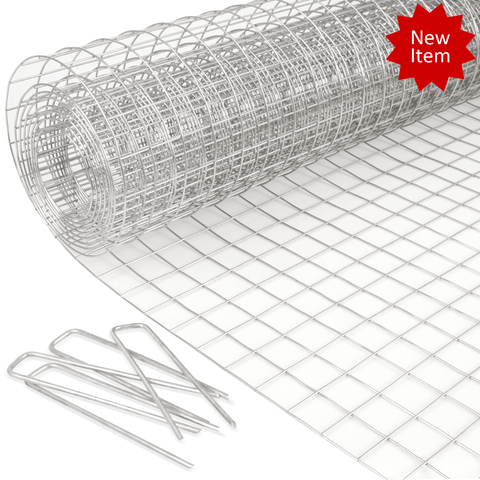
Garden paths created with raised beds offer a natural defense against weeds. The defined borders make it easier to spot and remove unwanted plants, reducing the competition for resources. Additionally, raised beds can be lined with various materials, such as landscape fabric, which further inhibits weed growth. Elevated beds also deter some garden pests and make it more challenging for critters to access your precious plants.
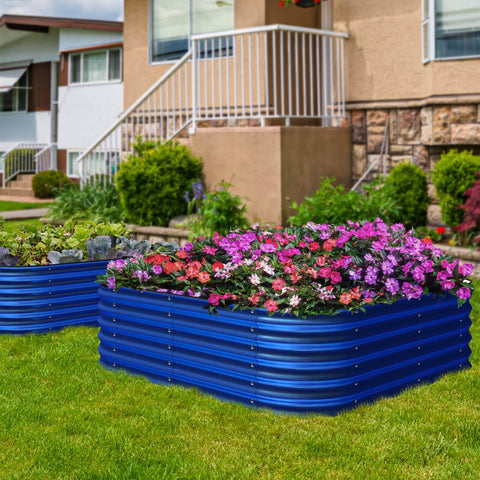
Enhanced Aesthetics
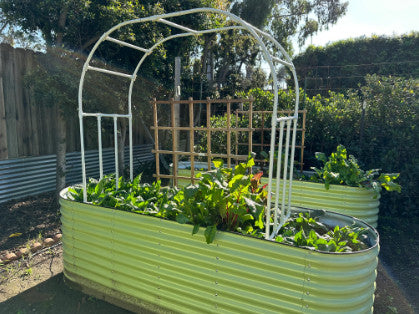
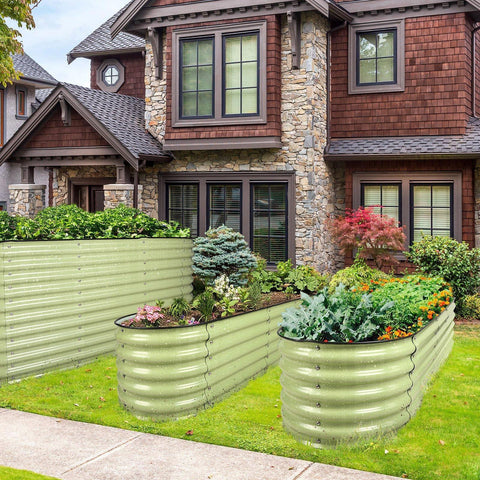
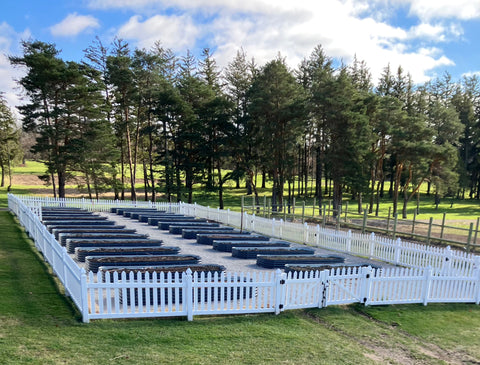
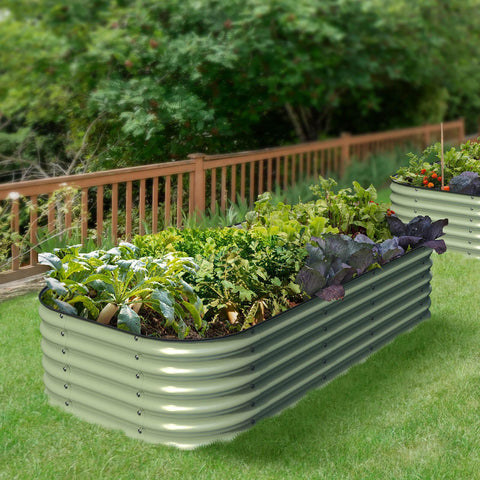
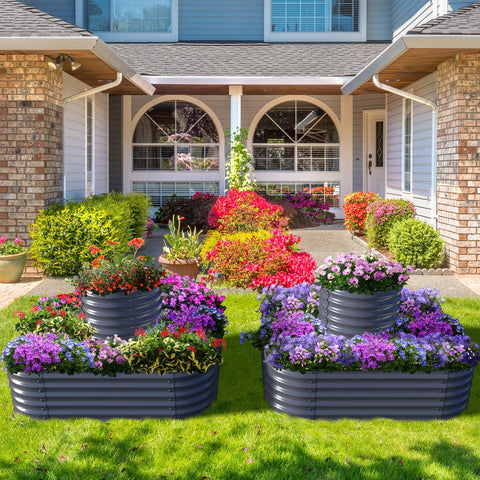
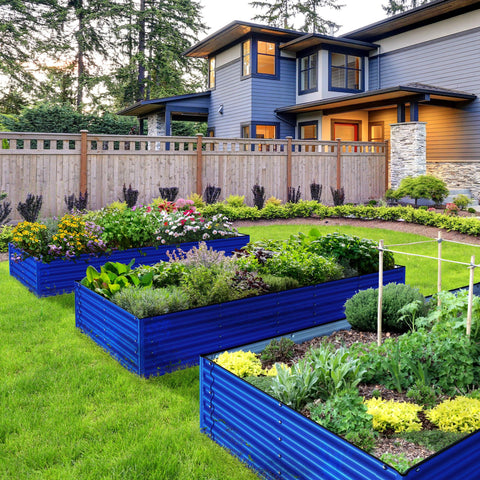
Beyond the practical advantages, raised beds can significantly improve the aesthetics of your garden. They create clean lines and visually distinct planting areas, making your garden more organized and visually appealing. The elevated beds add dimension to your landscape design and can be creatively integrated into your overall garden layout.
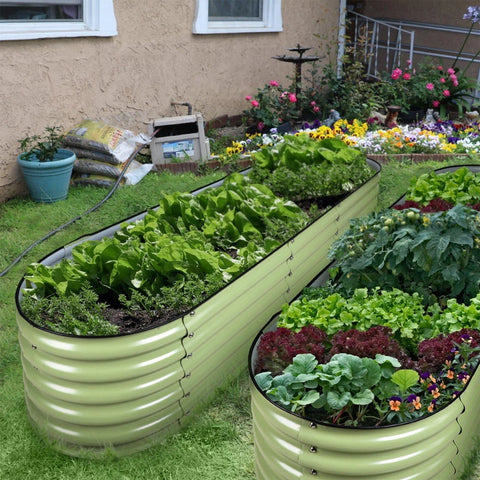
Efficient Space Utilization
When you create garden paths using raised beds, you make the most of your available space. These beds can be designed to fit your specific garden dimensions, allowing you to maximize your growing area while still providing easy access to all plants. This efficient use of space is especially beneficial for those with limited gardening real estate.
Easier Maintenance
Maintaining a garden with raised beds and paths is generally less labor-intensive. The clearly defined borders make it simpler to weed, water and care for your plants. It's also easier to amend the soil or add compost when needed, as you're working within a contained space.
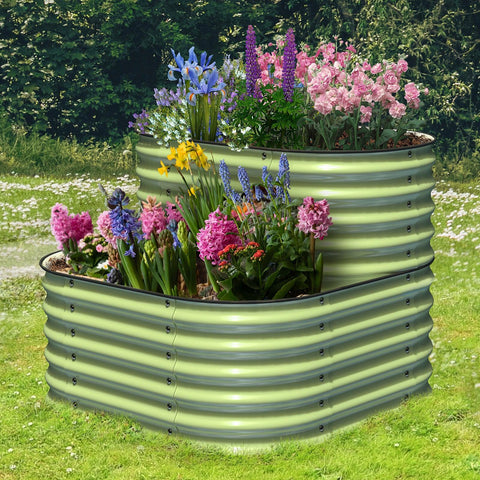
Versatility in Design
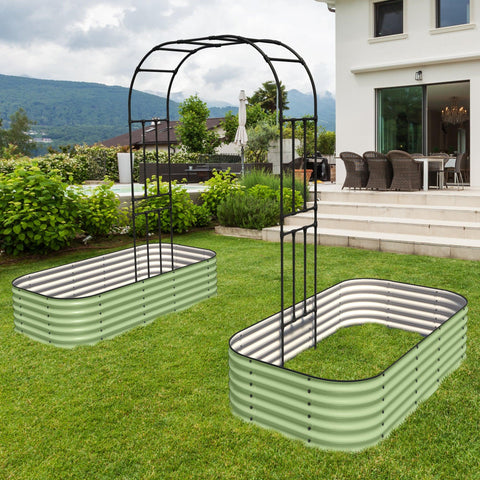
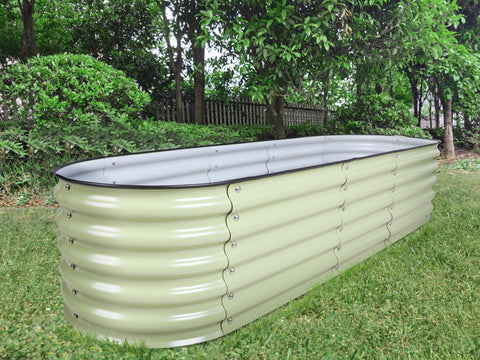
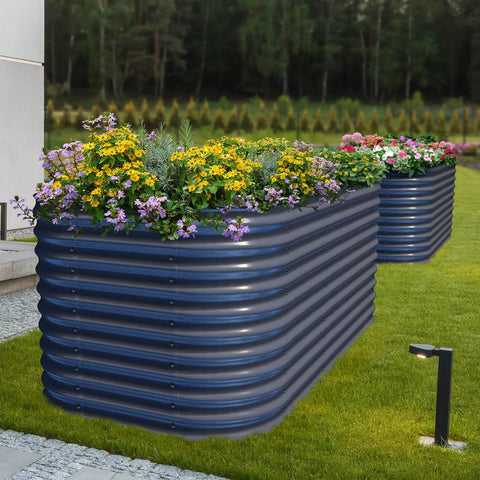
Raised beds offer a world of design possibilities. You can choose from various materials like wood, stone, or metal to match your garden's aesthetic. You can also experiment with different heights, shapes, and configurations to create a unique and personalized garden path that reflects your style and preferences.
Incorporating raised beds into your garden paths is a practical and aesthetically pleasing choice that brings numerous benefits to your gardening experience. From improved accessibility and soil quality to extended growing seasons and enhanced aesthetics, these beds are a versatile and efficient way to elevate your garden game. So, why wait? Transform your garden into a green paradise with raised beds, and enjoy the many advantages they offer. Happy gardening!
Raised beds not only define the pathway but also provide an opportunity to grow a variety of plants, herbs, and flowers. In this article, we'll guide you through the process of creating enchanting garden paths using raised beds, turning your garden into a breathtaking oasis of beauty and tranquility.
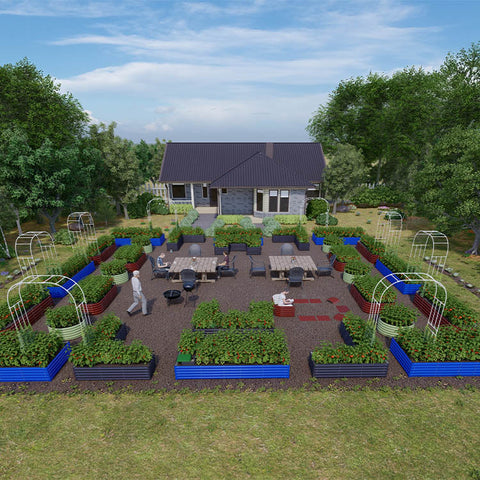
Step 1: Plan Your Pathway
Before you begin building raised beds for your garden path, it's crucial to plan the layout carefully. Consider the following:
Pathway Design: Decide on the shape, width, and flow of your garden path. Curved paths can add a sense of intrigue and lead visitors on a journey through your garden.
Materials: Choose the materials for your raised beds and pathway. Common options include wood, stone, brick, or concrete blocks. Make sure the materials complement the style of your garden.
Sunlight: Take note of how much sunlight each section of the path receives, as this will influence your plant choices.
Plant Selection: Plan what types of plants you want to grow in your raised beds. Consider the height, color, and seasonal interest of each plant to create a visually appealing path.
Step 2: Build Your Raised Beds
Once you've finalized your pathway design, it's time to construct the raised beds. Follow these steps:
Measure and Mark: Use stakes and string to outline the path's edges and the location of the raised beds. Make sure the dimensions are consistent and visually pleasing.
Select Bed Materials: Choose your preferred materials for the raised beds. Wood is a popular choice for its natural look, but be sure to use rot-resistant types like cedar or redwood. Alternatively, use stone, brick, or concrete blocks for a more permanent and structured look.
Level the Ground: Ensure that the ground beneath the raised beds is level. Use a shovel and a level to create a solid foundation for the beds.
Assemble Beds: Construct the raised beds according to your chosen design, securing the corners with screws or mortar for stone or brick beds.
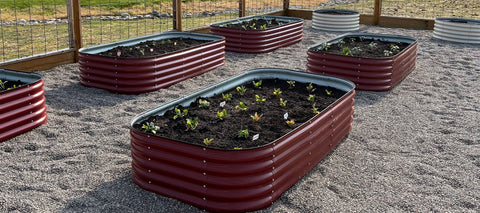
Fill with Soil: Fill the beds with a quality garden soil mix, rich in organic matter, to provide a healthy environment for your plants.
Step 3: Plant Your Raised Beds
Now comes the exciting part – planting your raised beds to create an enchanting garden path. Here are some tips:
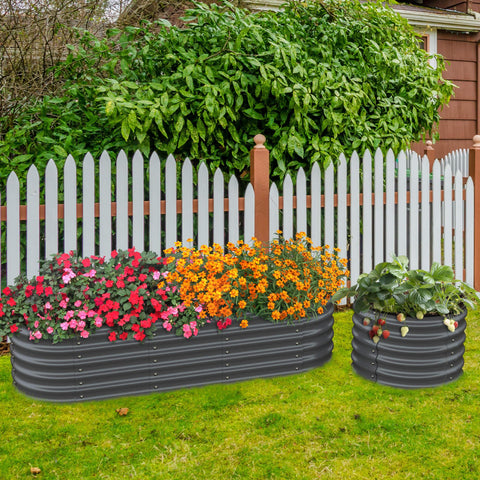
Consider Height: Place taller plants towards the back of the bed and shorter ones at the front. This provides a sense of depth and allows all plants to receive sunlight.
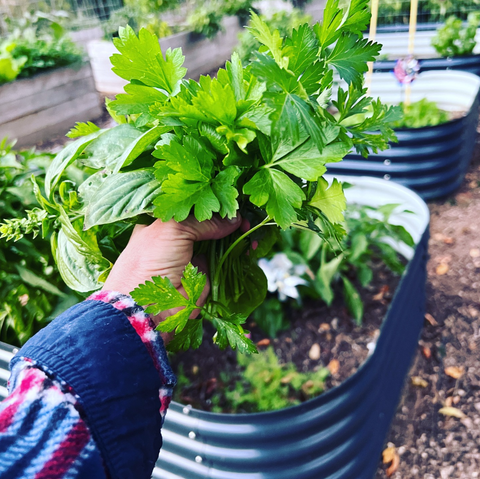
Mix Textures and Colors: Incorporate a variety of plant textures and colors to make the garden path visually captivating. For example, mix flowering plants, ornamental grasses, and herbs.
Think Seasonally: Plan for year-round interest by choosing plants that bloom or display foliage at different times of the year. This ensures your garden path remains beautiful in every season.
Maintenance: Be mindful of the maintenance requirements of each plant. Some may need regular pruning, while others may thrive with minimal care.
Step 4: Pathway Construction
With the raised beds in place and your plants thriving, it's time to finish your garden path:
Path Material: Lay down your chosen pathway material, whether it's gravel, stepping stones, or mulch. This will create a clear separation between the raised beds and provide a safe walking surface.
Edging: Install edging along the sides of the path to keep the materials in place and add a polished look to your garden.
Illumination: Consider adding pathway lighting to enhance the beauty of your garden path during the evening hours.
Step 5: Enjoy and Maintain
Your garden path with raised beds is now complete. Regularly water, weed, and care for your plants to keep them healthy and vibrant. Trim any overgrown branches or plants that may obstruct the path. With proper maintenance, your garden path will continue to enchant and delight you and your visitors for years to come.
Creating garden paths with raised beds is a fantastic way to combine form and function in your outdoor space. With careful planning and attention to detail, you can transform your garden into a breathtaking oasis that reflects your personality and gardening prowess. So, roll up your sleeves, put on your gardening gloves, and get ready to embark on the journey of creating an enchanting garden path that will be the envy of all who visit.
]]>Pests: The Bane of Your Garden
Pests come in various forms, from insects like aphids, beetles, and caterpillars to larger critters such as rabbits, squirrels, and gophers. These unwelcome guests can wreak havoc on your plants, eating leaves, stems, and roots. Pesticides are often used to combat pests, but they can harm beneficial insects and have adverse effects on the environment. A more sustainable solution is needed.
Diseases: The Silent Killers
Garden diseases, caused by bacteria, fungi, or viruses, can quickly devastate your plants. Common examples include powdery mildew, blight, and rust. Prevention is key when it comes to garden diseases, as they can be challenging to treat once established.
Soil Quality: The Foundation of Your Garden
Healthy soil is the backbone of any successful garden. Poor soil quality can lead to stunted plant growth, reduced yields, and increased susceptibility to pests and diseases. Common soil issues include compaction, low fertility, and imbalanced pH levels.
Gopher netting is a multipurpose tool that effectively addresses all these common garden problems. Here's how it can help:
Pest Control: Keeping Critters at Bay
Gopher netting serves as a physical barrier, preventing larger pests like gophers, rabbits, and squirrels from accessing your garden. By installing the netting around your garden beds or creating underground barriers, you can safeguard your plants without resorting to harmful pesticides.
Disease Prevention: Protecting Your Plants
Some garden diseases are soil-borne or spread through splashing water droplets. Gopher netting can be used as a ground cover or placed over vulnerable plants to prevent soil-borne diseases and reduce the risk of fungal spores splashing onto leaves.
Soil Improvement: A Healthy Foundation
Gopher netting can also be used to enhance soil quality. When placed on the ground, it can act as a weed barrier, reducing weed competition and allowing your plants to thrive. Moreover, it can help retain moisture and protect the soil from erosion, promoting a healthier growing environment.
How to Use Gopher Netting Effectively
Here are some tips for using gopher netting to troubleshoot common garden problems:
Choose the Right Type: Gopher netting comes in various sizes and materials. Select a mesh size appropriate for the pests you want to deter and ensure it's made of durable materials to withstand the elements.
Proper Installation: Install the netting correctly to create an effective barrier. For underground barriers, dig a trench and bury the netting at least 12 inches deep. For above-ground use, secure the netting around your garden beds or individual plants.
Regular Maintenance: Check your gopher netting regularly for wear and tear, and repair or replace it as needed. Ensure it remains secure to keep pests out and protect your plants.
Combine with Other Practices: While gopher netting is an excellent tool, it's most effective when used in conjunction with other gardening best practices, such as crop rotation, proper watering, and soil testing.
Gophers can wreak havoc on your garden, munching on roots and causing damage that can be disheartening for any gardening enthusiast. One effective way to deter these underground invaders is by using gopher netting in combination with raised beds. In this part, we'll explore various ways to use gopher netting to safeguard your raised bed garden and keep it thriving.
One of the most common ways to use gopher netting with a raised bed is by lining the bottom of the bed with it. Simply measure the dimensions of your raised bed and cut the netting to fit. Place it at the bottom before adding soil. This method acts as a barrier, preventing gophers from burrowing up into your raised bed from below.
Gophers are known for their digging skills, and they can tunnel their way into a raised bed from the sides. To prevent this, consider wrapping gopher netting around the exterior of your raised bed. This added layer of protection makes it difficult for gophers to access your precious plants.
If you want to go the extra mile in protecting your garden from gophers, consider crafting gopher-proof lids for your raised beds. These lids can be made from wooden frames covered in gopher netting. They are particularly useful for raised beds that house plants susceptible to gopher damage, such as root vegetables.
To create a comprehensive gopher deterrent system, combine gopher netting with raised bed fencing. Install a fence around your raised beds, burying the netting a few inches into the ground to prevent gophers from burrowing underneath. This double-layered defense system provides extra protection against gophers and other burrowing pests.
While raised beds are a popular choice for many gardeners, container gardening is also gaining popularity. If you prefer growing your plants in containers, consider placing gopher netting at the bottom of your large pots or containers. This prevents gophers from accessing the plant's roots and causing damage.
Gophers aren't limited to underground mischief. They may also feed on the above-ground parts of your plants, particularly during the growing season. In such cases, you can create small gopher netting enclosures or cages around individual plants or rows to keep them safe from nibbling gophers.
Incorporating gopher-repellent plants into your raised bed garden can complement the use of gopher netting. Some plants, like castor beans or gopher spurge, have natural deterrent properties. Planting these alongside your vulnerable crops can help deter gophers from venturing into your garden.
Although it has its rewards, gardening is not without its difficulties. Pests, diseases, and poor soil quality can threaten the health of your garden. However, with the versatile solution of gopher netting, you can tackle these common garden problems effectively and sustainably. By implementing gopher netting in your gardening toolkit, you'll be well on your way to enjoying a thriving and bountiful garden for years to come. Happy gardening!
]]>Before you embark on your journey of adorning your living space with indoor plants on trellises, it's essential to select the right plants. Not all plants are suitable for trellises, so it's essential to select ones that have a natural tendency to climb. Climbing plants have specialized structures, such as tendrils or aerial roots, that enable them to grip onto trellises and grow upwards. Some popular climbing indoor plants include:
2.Philodendron (Philodendron spp.): Philodendrons come in various varieties, including the popular heartleaf philodendron. They are known for their lush, trailing vines that look stunning on trellises.
3.Hoyas (Hoya spp.): Hoyas, also known as wax plants, feature thick, waxy leaves and produce beautiful clusters of fragrant flowers. They are well-suited for trellises.
4.Climbing Roses (Rosa spp.): For those who want a touch of romance and elegance, climbing roses can be trained on trellises indoors, provided they receive ample sunlight.
Trellises come in various styles, materials, and sizes. Selecting the right trellis can significantly impact the aesthetics and functionality of your indoor garden. Here are some factors to consider:
Size: Ensure the trellis is appropriate for the size of the plant. Some plants, like monsteras, can grow quite large, so choose a trellis that can accommodate their growth.
Material: Common materials include wood, metal, and plastic. Wooden trellises offer a rustic look, while metal trellises provide a sleek, modern appearance. Choose a material that complements your décor.
Style: Trellises come in various styles, from traditional lattice to more intricate designs. Pick one that aligns with your personal style and the atmosphere you want to create.
Taking care of indoor plants on trellises is similar to caring for any other potted plants, with a few additional considerations:
Light: Ensure your trellised plants receive the appropriate amount of light. The majority of indoor climbing plants favor direct, bright light. Adjust their placement accordingly.
Watering: Maintain a consistent watering schedule, allowing the soil to partially dry out between waterings. Avoid overwatering at all costs to prevent root rot.
Pruning: Regularly trim and train your plants to encourage growth along the trellis. This not only keeps them looking tidy but also promotes healthier growth.
Fertilization: Use a balanced, water-soluble fertilizer during the growing season to provide essential nutrients. Observe the directions provided on the product's label.
Creating an indoor garden with trellised plants opens up a world of creative possibilities. Here are some design ideas to inspire your indoor oasis:
Room Divider: Use tall trellises to divide a room subtly. This can create separate living spaces while maintaining an open and airy feel.
Vertical Garden: Mount multiple trellises on a wall to create a stunning vertical garden. Mix and match plant varieties to add color and texture to your space.
Corner Statement: Place a trellis in a corner to transform a neglected area into a lush focal point. This works particularly well with tall, climbing plants.
Hanging Trellises: Suspended trellises with trailing plants like string of pearls or devil's ivy can make an eye-catching centerpiece.
Indoor plants with trellises offer a unique and beautiful way to bring the outdoors inside. Whether you're looking to create a serene, natural atmosphere or make a bold design statement, trellised plants can help you achieve your indoor gardening goals. With proper plant selection, care, and a dash of creativity, you can turn your living space into a thriving, green oasis that you'll enjoy for years to come.
]]>
Why Choose Raised Bed Gardens for Butterfly Gardens?
Raised bed gardens offer several advantages for butterfly gardening:
Improved Drainage: Raised beds typically have better drainage than traditional in-ground gardens, preventing waterlogging and providing a healthier environment for both plants and butterflies.
Controlled Environment: You can control the soil quality, composition, and amendments in raised beds, creating the ideal conditions for butterfly-attracting plants.
Reduced Weeding: Raised beds can be designed with weed barriers, reducing the need for constant weeding and maintenance.
Accessibility: The elevated nature of raised beds makes it easier for you to access your garden and observe butterflies up close.
Aesthetic Appeal: Raised beds can be designed to enhance the visual appeal of your garden, making it a true oasis for both you and the butterflies.
Now, let's delve into the steps to create a butterfly garden using raised bed gardens:
Step 1: Select a Suitable Location
Choose a sunny location for your raised-bed butterfly garden. Butterflies are cold-blooded creatures, so they require warmth from the sun to be active. Make sure the area receives at least 6 hours of sunlight per day.
Step 2: Design Your Raised Bed Gardens
Design your raised bed gardens to fit harmoniously into your landscape. Consider using a variety of shapes, sizes, and heights to create visual interest. Remember to leave enough space between beds for easy movement and maintenance.
Step 3: Choose Butterfly-Friendly Plants
Select nectar-rich and host plants that attract butterflies. Some popular choices include
Nectar Plants: Butterfly bushes, coneflowers, salvia, and lantana.
Host Plants: Milkweed for monarch butterflies, parsley for swallowtails, and dill for black swallowtails.
Make sure to choose a mix of plants that bloom at different times throughout the season to provide a continuous food source for butterflies.
Step 4: Prepare the Soil
Fill your raised beds with a well-draining, organic soil mix. Add compost to enrich the soil and provide essential nutrients for your plants. Ensure the soil is loose and well-aerated to encourage healthy root growth.
Step 5: Plant Strategically
Place taller plants at the back of your raised beds and shorter ones at the front. This creates a layered effect, making your garden visually appealing and providing easy access for butterflies.
Step 6: Add Butterfly-Friendly Features
Enhance your butterfly garden by including features such as:
Shallow dishes with water and rocks for butterflies to drink from.
Flat stones or logs for basking in the sun.
Windbreaks or trellises to protect the garden from strong winds.
Step 7: Maintain Your Garden
Regularly water your garden to keep the soil consistently moist, but avoid overwatering. Mulch can help retain moisture and deter weeds. Prune and deadhead spent blooms to encourage new growth and more butterfly visits.
Step 8: Observe and Enjoy
Now that your raised bed butterfly garden is in full swing, take time to observe and enjoy the butterflies that visit. Keep a journal to document the species you see and their behaviors. You might even consider participating in citizen science projects that track butterfly populations.
Creating a butterfly garden with raised bed gardens not only beautifies your outdoor space but also provides a vital habitat for these enchanting insects. By following these steps and maintaining your garden with care, you'll create a haven that attracts butterflies, supporting their conservation while offering you a delightful and educational experience in your own backyard. So, get ready to transform your yard into a butterfly paradise and let your love for gardening take flight!
]]>
Chapter 1: The Benefits of Community-Raised Bed Gardens
Before diving into the practical steps of creating a community raised bed garden, let's first explore the many advantages it offers:
Community Bonding: These gardens foster a sense of community, as they require teamwork and cooperation. Neighbors come together to plant, tend, and harvest the garden, strengthening their connections.
Accessible Gardening: Raised beds are more accessible for people with mobility issues, making gardening an inclusive activity for all ages and abilities.
Space Efficiency: Raised beds maximize space, making them ideal for urban areas or places with limited gardening space.
Increased Productivity: Raised beds provide better soil quality and drainage, resulting in healthier plants and higher yields.
Educational Opportunities: Community gardens are excellent educational resources, teaching members about gardening, nutrition, and environmental sustainability.
Chapter 2: Planning Your Community-Raised Bed Garden
Creating a successful community raised bed garden starts with careful planning:
Select a Suitable Location: Choose an open, sunny area with access to water. Ensure the land is flat and free from obstacles.
Engage the Community: Gauge interest and gather potential participants. Hold community meetings to discuss the project and form a dedicated garden committee.
Garden Design: Decide on the garden's layout, the number and size of raised beds, and the pathways between them. Take the community's needs and preferences into account.
Chapter 3: Building Your Raised Beds
It's time to put your hands to work and roll up your sleeves.
Materials Needed: Gather the necessary materials, including untreated lumber, screws, a saw, measuring tape, and a level.
Bed Construction: Build the raised beds according to your predetermined design. Ensure they are sturdy, level, and well-secured.
Soil Selection: Fill the beds with a rich, well-draining soil mix. Consider conducting soil tests to determine the soil's nutrient content and pH level.
Chapter 4: Planting and Maintenance
With your raised beds in place, it's time to bring your garden to life:
Plant Selection: Choose a variety of vegetables, herbs, and flowers that are well-suited to your region and the preferences of your community.
Planting: Follow the recommended spacing and planting depth for each crop. Consider companion planting to maximize productivity and deter pests.
Maintenance: Create a watering schedule, establish a weeding routine, and monitor for pests and diseases. Encourage community members to take turns caring for the garden.
Chapter 5: Community Engagement
A thriving community-raised bed garden relies on active participation and engagement:
Workshops and Events: Organize educational workshops, garden tours, and seasonal celebrations to keep community members engaged and informed.
Harvest and Sharing: Encourage members to share the harvest, either among themselves or with local food banks and charities.
Record Keeping: Maintain a garden journal to track planting dates, yields, and any challenges faced. This helps with planning future seasons.
Chapter 6: Sustainability and Longevity
To ensure your community raised bed garden stands the test of time:
Composting: Set up a composting system to recycle organic matter from the garden and reduce waste.
Community Involvement: Continuously involve the community in decision-making and maintenance to maintain interest and commitment.
Fundraising: Consider organizing fundraisers or seeking grants to cover maintenance costs and expand the garden if necessary.
Creating a community-raised bed garden is not just about growing plants; it's about cultivating connections, promoting sustainability, and enhancing the quality of life in your neighborhood. By following the steps outlined in this guide and fostering a sense of community, you can create a thriving garden that brings people together and yields bountiful harvests for years to come. So, roll up your sleeves, gather your neighbors, and start planting the seeds of a stronger, healthier community today.
]]>Before you start building your raised bed garden, it's essential to select the right location. Here are some factors to consider:
Sunlight: The majority of plants, including vegetables and flowers, need at least 6 to 8 hours of direct sunlight each day. Pick a location that gets plenty of light all day.
Accessibility: Ensure your raised bed is easily accessible for planting, watering, and harvesting. You don't want to trek through mud or struggle with heavy equipment.
Proximity to Water: Place your raised bed near a water source to make watering more convenient. Installing a drip irrigation system can also save time and ensure consistent moisture.
Soil Quality: Assess the soil quality in the chosen area. Raised beds allow you to fill them with the ideal soil mix, but if your site has poor drainage, it may require additional attention.
Once you've chosen the perfect location, it's time to construct your raised bed. Here's how to do it:
Materials: You can use various materials, including wood, concrete blocks, or even recycled materials like old tires or pallets. Ensure the chosen material is non-toxic and won't leach harmful chemicals into your soil.
Size: Keep the width of your raised bed between 3 to 4 feet, as this allows you to reach the center comfortably without stepping into the bed. The length can change based on the amount of room.
Height: A typical height for raised beds is 12 to 24 inches. Taller beds are more accessible for people with mobility issues.
Leveling: Ensure the base of your raised bed is level to prevent uneven water distribution. Use a level and a tape measure to achieve this.
One of the key factors that contribute to the success of a raised bed garden is the soil mix you use. Unlike traditional in-ground gardens, where you may need to work with your existing soil, raised beds offer the advantage of complete control over your garden's growing medium. In this blog post, we will explore the importance of selecting the right soil mix for your raised bed garden and provide guidance on how to create the ideal blend for your plants to thrive.
Why the Right Soil Mix Matters
Drainage and Aeration: The soil mix in your raised bed must have proper drainage and aeration to prevent waterlogging. Good drainage ensures that your plants' roots do not suffocate, while adequate aeration allows them to access oxygen.
Nutrient Retention: The soil mix should retain essential nutrients, ensuring your plants have access to the minerals and trace elements they need for healthy growth.
pH Balance: The pH level of your soil mix affects nutrient availability to plants. Different plants have different pH preferences, so your soil mix should align with what you plan to grow.
Weed and Pest Control: A well-structured soil mix can also help deter weeds and some garden pests, reducing the need for constant maintenance and pest control efforts.
Now that we understand why the right soil mix is essential let's delve into how to select and create the perfect blend.
Choosing the Right Ingredients
Topsoil: High-quality topsoil is the foundation of your raised bed garden. It ought to be nutrient- and organic-rich. You can purchase screened topsoil or use your own if it's suitable.
Compost: Compost adds valuable organic matter and nutrients to your soil mix. It improves both water retention and drainage. You can make your compost or buy it from a garden center.
Peat Moss or Coconut Coir: These materials help retain moisture in your soil mix, ensuring your plants have a consistent source of water. Peat moss is acidic, so consider your pH requirements when choosing between the two.
Perlite or Vermiculite: These additives improve aeration and drainage. They also help prevent soil compaction, which can be a problem in raised beds.
Fertilizers: Consider adding slow-release organic fertilizers to provide a steady supply of nutrients throughout the growing season. Alternatively, you can use composted manure or worm castings for a nutrient boost.
Creating the Ideal Mix
It's time to combine your ingredients now that you have them. Here's a basic recipe for a raised bed soil mix:
50% Topsoil
30% Compost
10% Peat Moss or Coconut Coir
10% Perlite or Vermiculite
Mix these ingredients thoroughly in a wheelbarrow or on a tarp. Be sure to break up any clumps and create a consistent blend. Once your mix is ready, fill your raised bed with it, leaving about an inch or two of space at the top for mulch or additional compost.
Maintaining Your Soil Mix
Your work doesn't end once your raised bed is filled with the perfect soil mix. Here are some recommendations for keeping it:
Mulch: Apply a layer of mulch on top of your soil to help retain moisture and regulate soil temperature.
Regular Testing: Periodically test your soil's pH and nutrient levels to ensure it meets your plants' requirements.
Crop Rotation: Rotate your crops each season to prevent soil depletion of specific nutrients.
Compost and Fertilize: Add compost and fertilizers as needed to replenish nutrients throughout the growing season.
With your raised bed ready, it's time to plant and maintain your garden. Here's what you need to know:
Plant Spacing: Follow recommended spacing guidelines for each type of plant to prevent overcrowding.
Mulching: Apply mulch to help retain moisture, suppress weeds, and regulate soil temperature.
Regular Watering: Monitor soil moisture and water consistently. Raised beds can dry out more quickly, so a drip irrigation system or soaker hose can be beneficial.
Weeding: Keep an eye out for weeds and remove them promptly to prevent competition for nutrients.
Crop Rotation: To prevent soil depletion and pest buildup, rotate your crops each season.
Pest and Disease Control: Implement natural pest control methods, such as companion planting or organic pesticides, to protect your plants.
Harvesting: Harvest your crops at their peak of ripeness for the best flavor and nutrition.
Raised bed gardening offers an efficient and productive way to cultivate your own green paradise, even in limited spaces or challenging soil conditions. By choosing the right location, constructing a sturdy bed, creating a nutrient-rich soil mix, and following best practices for planting and maintenance, you'll be well on your way to enjoying a flourishing raised bed garden. So, roll up your sleeves, put on your gardening gloves, and start building your green thumb's paradise today!
]]>
First and foremost, garden gates with trellis and raised beds instantly elevate the aesthetics of your garden. The trellis adds vertical interest and serves as an attractive backdrop for climbing plants like roses, ivy, or jasmine. This creates a lush, vibrant display of colors and textures that is truly enchanting.
In smaller gardens, space is often at a premium. Raised beds help maximize your growing area by providing extra planting space while keeping everything neat and organized. The trellis adds a vertical dimension to your garden, effectively using all available space and allowing you to grow more plants in a confined area.
Garden gates, when integrated with raised beds, make tending to your plants a breeze. You can access your garden without trampling on delicate plants, reducing the risk of damage. This makes planting, weeding, and harvesting more convenient, especially for those with mobility issues.
Raised beds are designed to have excellent drainage, preventing waterlogged soil and root rot. This means your plants are less likely to suffer from overwatering, and you have more control over the moisture levels in the soil, which is crucial for the health of your garden.
The raised beds in this setup offer better soil temperature regulation. They warm up faster in the spring, which can extend your growing season. This allows you to plant earlier and enjoy fresh produce for a more extended period.
Elevating your plants in raised beds can help deter some garden pests. Many crawling insects, such as slugs and snails, have a harder time reaching your precious crops when they're raised off the ground. Additionally, you can install protective netting on the trellis to keep out birds and other animals.
Garden gates with trellis and raised beds provide a canvas for your creativity. You can play around with different plant pairings, hues, and textures. Climbing plants on the trellis can act as natural shades for shade-loving plants beneath. This fusion allows you to craft a garden that's uniquely yours.
A garden gate with trellis and raised beds can help define separate areas within your garden. The ability to divide your garden into various themes or parts, such as a vegetable garden, a flower garden, or a herb garden, is very helpful for those who prefer cultivating a variety of plants.
These garden features are not limited to the backyard. Placing a garden gate with trellis and raised beds in your front yard can significantly boost your home's curb appeal. It offers a warm and inviting welcome to visitors, creating a memorable first impression.
Lastly, this garden fusion can increase the overall value of your property. A well-maintained, attractive garden with unique features like trellis and raised beds can be a selling point when it's time to put your house on the market.
A beautiful garden is often defined not only by its vibrant flowers and lush greenery but also by its architectural elements. Garden gates are a wonderful addition that can enhance the aesthetic appeal of your outdoor space while providing practical benefits such as privacy and security. In this article, we'll explore how to create garden gates using trellis and raised beds, combining both functionality and beauty in your garden.
Materials You'll Need
Trellis Panels: These will serve as the main structure of your gate. Choose trellis panels that are sturdy and made from weather-resistant materials like cedar or pressure-treated wood.
Raised Bed Frames: Opt for raised bed kits or build custom frames from wood to create the structure of your gate. The dimensions will depend on the size of the opening you're covering.
Gate Hinges: Select durable gate hinges that can support the weight of your gate. Consider heavy-duty strap hinges for added strength.
Gate Latch: Choose a latch that complements the design of your gate and provides secure closure.
Screws and Nails: Ensure you have the appropriate hardware for securing the trellis and raised bed frames together.
Tools: You'll need tools like a saw, drill, screwdriver, and measuring tape for the construction process.
Step-by-Step Guide:
Before you start building, it's essential to plan your garden gate's design. Consider the dimensions of the gate, the style of trellis, and the type of climbing plants you want to grow on it. Sketch out your ideas to visualize the final result.
Begin by building the raised bed frames that will serve as the gate's structure. Measure and cut the wood to the desired dimensions and assemble the frames using screws or nails. Make sure the frames are square and sturdy.
Secure the trellis panels to the raised bed frames using screws. Place the trellis on one side of the frame, leaving an equal overhang on both sides to create the gate's wings. Ensure that the trellis is level and properly aligned with the frame.
To strengthen your gate, add diagonal braces on the backside. These braces provide extra stability and prevent the gate from sagging over time.
Attach gate hinges to one side of the gate frame, ensuring they are level and properly aligned with the raised bed. Then, mount the other side of the hinges onto a secure post or structure in your garden.
Install a gate latch on the opposite side of the hinges. This will allow you to easily open and close the gate securely.
To enhance the gate's appearance, consider painting or staining it to match your garden's aesthetics. You can also add decorative elements, such as finials or trim, to give your gate a personalized touch.
Now that your garden gate is complete, it's time to plant climbing vines or flowers at the base of the gate. As these plants grow, they will beautifully cover the trellis and add a natural, picturesque element to your garden.
Creating garden gates using trellis and raised beds is a rewarding DIY project that combines functionality with aesthetic appeal. With careful planning and the right materials, you can craft a charming and practical entryway for your garden. Not only will it provide security and privacy, but it will also become a focal point in your outdoor space, inviting both admiration and envy from your neighbors and visitors. Enjoy the process of building your gate, and watch your garden flourish with the addition of climbing plants that will truly make your garden gate come alive.
]]>Whether you have limited outdoor space or simply want to maximize your gardening potential, vertical gardening in raised beds offers a host of benefits that can transform your gardening experience. In this article, we'll delve into the benefits of vertical gardening in raised beds and why you should consider giving it a try.
Space Efficiency
One of the primary reasons people turn to vertical gardening in raised beds is its space-saving design. Traditional horizontal gardens require ample ground space, which may be a luxury for urban gardeners or those with small yards. Vertical gardening allows you to make the most of limited space by growing upwards rather than outwards. This means you can cultivate a wide variety of plants even in a compact area, making it an ideal solution for balconies, patios, or small gardens.
Increased Plant Variety
Vertical gardening enables you to diversify your plant selection. You can grow a wide range of vegetables, herbs, flowers, and even fruits in the same vertical garden, as long as you choose the appropriate varieties and ensure proper spacing. This variety not only adds aesthetic appeal to your garden but also provides you with a bountiful harvest of fresh, homegrown produce.
Improved Accessibility
Raised beds, which are typically used in vertical gardening, offer the advantage of easy access. Gardeners don't have to bend or kneel down as much, reducing the strain on their backs and knees. This accessibility is particularly appealing to older gardeners or those with physical limitations. It also makes maintenance tasks such as weeding, watering, and harvesting more convenient.
Better Pest Control
Elevated vertical gardens are less susceptible to certain pests and diseases that commonly affect ground-level gardens. Raised beds make it harder for crawling pests to access your plants, and the increased air circulation can discourage the development of mold and mildew. Additionally, vertical gardening allows you to position your plants strategically, making it easier to spot and address any potential issues.
Efficient Water Usage
Vertical gardening promotes efficient water usage. With plants growing closer together, there is less open ground to water, reducing water wastage and helping you conserve this precious resource. Additionally, raised beds often come with efficient irrigation systems, further optimizing water distribution and minimizing runoff.
Aesthetic Appeal
Vertical gardens are visually striking and can enhance the beauty of your outdoor space. Whether you opt for a lush green wall or an artistic arrangement of colorful flowers, vertical gardening allows you to create a captivating focal point in your garden. It's a fantastic way to add natural beauty and charm to balconies, courtyards, or urban rooftops.
Extended Growing Season
Vertical gardening in raised beds can extend your growing season. Raised beds tend to warm up faster in the spring and stay warmer in the fall, providing a longer window of opportunity for growing plants. You can also easily cover vertical gardens with protective materials, such as row covers or cloches, to shield plants from frost, allowing you to enjoy fresh produce for an extended period.
Vertical gardening in raised beds is a game-changer for both novice and experienced gardeners. Its space-saving design, accessibility, and versatility make it an excellent choice for anyone looking to maximize their gardening potential. Whether you're growing vegetables, herbs, or ornamental plants, vertical gardening offers a host of benefits that can transform your outdoor space into a thriving and aesthetically pleasing garden. So, consider embracing the green revolution and start your vertical garden journey today!
Now, let's explore some innovative products and ideas to enhance your vertical raised bed gardening experience.
Stackable planters are a fantastic solution for vertical gardening in raised beds. These tiered containers come in various sizes and materials, allowing you to grow a variety of plants in a small space. You can stack them as high as you want, creating a beautiful cascading garden.
Wall-mounted garden pockets are a convenient way to transform a plain wall into a lush vertical garden. These pockets are typically made from durable fabric and can hold various plants and herbs. They are perfect for growing aromatic herbs right outside your kitchen, ensuring fresh ingredients for your culinary adventures.
If you're concerned about the maintenance of your vertical garden, consider vertical planters with built-in irrigation systems. These systems can be connected to a water source, ensuring that your plants receive a consistent water supply, even when you're away from home.
Get creative and repurpose wooden pallets into vertical gardens. You can lean them against a wall or fence, fill the spaces with soil, and plant your favorite flowers, herbs, or vegetables. Pallet gardens are a budget-friendly and environmentally sustainable option for vertical gardening.
Trellises and arbors are excellent additions to raised beds. They provide support for climbing plants such as tomatoes, cucumbers, and beans, allowing you to make the most of vertical space while enhancing the aesthetics of your garden.
Hang planters from your raised bed's sides or above it to create a suspended garden. You can grow trailing plants like strawberries, petunias, or succulents in these hanging containers, adding a touch of whimsy to your garden design.
Consider using recycled materials like old gutters, PVC pipes, or wooden crates to fashion unique vertical gardening solutions. These upcycled creations not only reduce waste but also add character to your garden.
For those who love culinary herbs, a herb spiral is an innovative idea. Build a spiral-shaped raised bed and plant herbs at varying heights to create an organized and visually appealing herb garden. This design also improves air circulation and drainage.
Vertical gardening in raised beds opens up a world of possibilities for gardeners, regardless of their space constraints. Whether you choose stackable planters, wall pockets, or DIY pallet gardens, these innovative products and ideas will help you make the most of your limited space while adding beauty and functionality to your garden. Get creative, experiment with different plants, and enjoy the benefits of a lush, thriving vertical garden right at your doorstep.]]>What Are Raised Bed Gardens?
Raised bed gardens are planting areas that are elevated above ground level. They consist of framed beds filled with soil that is raised higher than the surrounding ground. These structures offer numerous advantages for gardeners, making them increasingly popular in backyards and community gardens. Here are some key benefits of raised bed gardening:
Improved Drainage: Raised beds allow excess water to drain away more effectively than traditional gardens, preventing waterlogged roots and soil.
Better Soil Control: You have complete control over the soil composition in raised beds, which means you can create the ideal growing environment for your plants.
Reduced Weeding: The contained space of raised beds makes it easier to spot and remove weeds, reducing the time and effort required for maintenance.
Extended Growing Season: Raised beds warm up faster in the spring, enabling earlier planting and extending the growing season in colder climates.
Accessibility: Because they're elevated, raised beds are easier on the back and knees, making gardening more accessible for people of all ages.
Now that we understand the benefits let's explore some essential tips for success in your raised bed garden:
Choose a sunny spot for your raised bed garden. Most vegetables and flowers require at least 6-8 hours of direct sunlight each day. Ensure that your raised beds receive ample sunlight for optimal plant growth.
Your raised bed garden's success is primarily reliant on the soil's quality. Invest in a high-quality mix of garden soil, compost, and organic matter to provide your plants with the nutrients they need. Regularly amend the soil to maintain its fertility.
The dimensions of your raised bed matter. Make sure they're wide enough to comfortably reach across without stepping into the bed (typically 3-4 feet wide) and no longer than 8-12 feet to ensure easy access and maintenance.
To prevent waterlogging, ensure your raised beds have proper drainage. You can add a layer of gravel or use well-draining soil mix. Additionally, consider adding drainage pipes if needed.
When planning your raised bed garden, consider companion planting. Some plants grow better when placed near specific companions, while others inhibit each other's growth. Research companion planting for your chosen crops to maximize your yield.
Applying mulch around your plants helps retain moisture, reduces weed growth, and regulates soil temperature. Organic mulches like straw or wood chips work well in raised beds.
Just like any garden, raised bed gardens require maintenance. Water your plants consistently, prune when necessary, and keep an eye out for pests and diseases. The raised bed's contained environment makes it easier to manage these issues.
To prevent soil depletion and reduce the risk of pests and diseases, practice crop rotation. Don't plant the same type of crops in the same spot year after year.
Maintain a journal to track planting dates, crop varieties, and any issues you encounter. This record-keeping will help you learn from your experiences and plan better in the future.
Lastly, remember that gardening is a journey. Don't be discouraged by occasional setbacks or failures. Every season brings new opportunities to learn and improve your skills.
Creating a raised bed garden is an excellent way to transform your backyard into a green thumb's paradise. With careful planning, good soil management, and a little TLC, you can enjoy a bountiful harvest and the satisfaction of nurturing your own piece of nature. So, roll up your sleeves, pick up your gardening tools, and let your raised bed garden flourish! Happy gardening!
]]>The first step to successful small-scale gardening is selecting the right plants for your space. Opt for compact and dwarf varieties that are well-suited to small containers or raised beds. Herbs, cherry tomatoes, peppers, lettuce, and strawberries are great choices for small gardens. Consider your local climate and growing conditions when making your selections to ensure that your chosen plants will thrive.
Vertical gardening is a space-saving technique that allows you to grow plants upwards rather than outwards. Use trellises, wall-mounted planters, or hanging baskets to take advantage of vertical space. Vining plants like cucumbers, beans, and peas are ideal for vertical gardening and can create a lush and attractive display.
Containers are a small-scale gardener's best friend. They come in various sizes and materials, from terracotta pots to fabric bags and wooden crates. Containers offer flexibility, allowing you to move your plants around to catch the best sunlight and create visually appealing arrangements. Ensure that your containers have good drainage to prevent waterlogged soil.
In a small garden, every square inch counts, so make the most of your space by practicing companion planting. Companion planting involves planting compatible crops together to maximize space and deter pests. For example, planting basil alongside tomatoes can improve tomato flavor and repel certain insects.
Healthy soil is the foundation of any successful garden, regardless of its size. Invest in quality potting mix or compost to ensure your plants have the nutrients they need. Small gardens are particularly susceptible to soil depletion, so consider rotating crops or using cover crops to maintain soil fertility.
Small-scale gardens require consistent attention. Watering, weeding, and fertilizing should be part of your routine. Mulching can help conserve moisture and reduce the growth of weeds. Be diligent in checking for signs of pests or disease, as early detection can prevent an infestation from spreading.
Most plants require a minimum of 6 hours of sunlight daily to grow and produce fruit. In small gardens, it's crucial to make the most of available sunlight. Place your garden in the sunniest spot possible, and consider using mirrors or reflective surfaces to bounce sunlight onto your plants.
Small-scale gardening often calls for creative solutions. Consider interplanting, where you plant fast-growing crops like radishes between slower-growing ones. Additionally, you can use tiered shelving or raised beds to maximize space efficiency.
Organization is key to a successful small garden. Label your plants to avoid confusion, and keep tools and supplies neatly stored in a designated area. Regularly assess the garden's layout to see if any adjustments can improve efficiency or aesthetics.
Small-scale gardening allows you to experiment with various types of containers. Get creative and mix different shapes, sizes, and colors to add visual interest to your garden. Just ensure that each container suits the needs of the plants it houses.
By selecting the right plants, optimizing your space, and staying on top of maintenance, you can create a lush and productive garden in even the tiniest of spaces. So, roll up your sleeves, grab your gardening tools, and get ready to transform your small outdoor space into a green oasis of beauty and productivity.
Gardening with limited space doesn't mean you have to sacrifice the joy of growing your own food and flowers. Small-scale raised beds, along with thoughtful planning and care, can turn even the tiniest outdoor spaces into thriving gardens. By choosing the right products and following our tips, you can enjoy the therapeutic benefits and the delicious rewards of gardening, regardless of your space constraints. So, roll up your sleeves, grab your gardening tools, and start your small-scale raised bed garden adventure today! Happy gardening!
]]>In recent years, the popularity of gardening has surged, with more people realizing the numerous benefits of growing their own food. Whether you have a sprawling backyard or a limited urban space, one gardening method that has gained immense popularity is small-scale raised beds. In this article, we'll explore the compelling reasons why small-scale raised beds are becoming the go-to choice for gardeners of all skill levels.
Small-scale raised beds are a fantastic choice for urban dwellers, apartment renters, or anyone with limited outdoor space for several reasons:
Maximizing Space
One of the primary reasons to opt for small-scale raised beds is their ability to maximize space efficiently. Whether you have a tiny balcony or a postage-stamp-sized yard, raised beds allow you to grow a substantial amount of produce in a compact area. This space efficiency is particularly appealing for urban gardeners and those with limited outdoor space. With raised beds, you can make the most of every square foot available.
Improved Soil Quality
Small-scale raised beds offer superior control over the quality of your garden's soil. By filling these beds with a customized mix of soil, compost, and other organic matter, you can create the perfect growing environment for your plants. This control over soil quality is especially beneficial for gardeners dealing with poor or contaminated soil in their area. Raised beds enable you to start with a clean slate, ensuring healthier and more abundant crops.
Better Drainage
Effective drainage is crucial for plant health, and small-scale raised beds excel in this department. The elevated design of raised beds prevents waterlogging, a common issue in traditional in-ground gardening. Excess moisture can lead to root rot and other plant diseases, so improved drainage in raised beds contributes to the overall success of your garden.
Easy Maintenance
Gardening is a rewarding hobby, but it can also be physically demanding. Small-scale raised beds offer several advantages in terms of maintenance. Their compact size makes weeding, watering, and harvesting more manageable tasks. Bending and kneeling are minimized, reducing strain on your back and knees. This convenience makes gardening accessible to people of all ages and physical abilities.
Pest and Weed Control
Small-scale raised beds are excellent for controlling pests and weeds. Their confined space makes it easier to spot and manage any unwanted visitors in your garden. You can also employ various protective measures like netting and row covers more effectively. Additionally, because raised beds are filled with clean soil, weed infestations are significantly reduced, saving you time and effort.
Extended Growing Season
Raised beds warm up faster in the spring and stay warmer throughout the growing season, allowing you to extend your gardening calendar. This is especially advantageous for those in cooler climates or those who want to get a head start on their growing season. With the right precautions, you can enjoy fresh produce well into the fall.
Aesthetically Pleasing
Beyond their functional benefits, small-scale raised beds can add aesthetic appeal to your outdoor space. They can be constructed in various materials, designs, and colors to complement your existing landscape or create an attractive focal point in your garden. Raised beds also make it easier to organize your garden and create visually appealing layouts.
Small-scale raised beds are a versatile and efficient gardening solution that offers numerous advantages. From space optimization to improved soil quality, better drainage, and easy maintenance, these compact growing spaces are suitable for gardeners of all levels of expertise. Whether you have a tiny balcony or a large backyard, consider implementing small-scale raised beds in your gardening repertoire to unlock their myriad benefits and enjoy the fruits of your labor year-round.
Now, let's dive into some practical tips and product recommendations to get your small-scale raised bed garden off to a great start.
The Gopher Problem
Gophers are notorious garden pests that can quickly turn your flourishing garden into a battlefield. These burrowing rodents tunnel underground, feeding on plant roots and causing extensive damage. To effectively address this issue while adhering to IPM principles, gopher netting is a valuable tool.
Gopher Netting: An IPM Essential
1. Prevention is Key: Gopher netting serves as a physical barrier that prevents gophers from accessing your garden beds. By installing netting before planting, you create a protective shield for your plants.
2. Environmentally Friendly: Gopher netting aligns perfectly with IPM principles by avoiding the use of chemical pesticides that can harm beneficial insects and the ecosystem.
3. Non-Lethal: Unlike traps or poisons, gopher netting is non-lethal. It keeps gophers out of your garden without causing harm to the creatures.
4. Durability: High-quality gopher netting is durable and long-lasting. It can be reused season after season, reducing waste and saving you money in the long run.
5. Easy Installation: Gopher netting is relatively simple to install. It can be laid out on the soil surface or buried a few inches below the ground to create a secure barrier.
Steps to Implement Gopher Netting in Your Garden
1. Assess Your Garden: Identify areas of your garden that are vulnerable to gopher activity. Focus on raised beds, vegetable gardens, and areas with newly planted seedlings.
2. Choose the Right Netting: Select gopher netting that is appropriate for your garden's needs. Ensure it is made from durable materials and is the correct size to cover your planting area.
3. Install Properly: If you're laying the netting on the surface, secure the edges with landscape staples. If burying, ensure it is at least 6 inches below the soil surface.
4. Regular Inspections: Periodically check the netting for any damage or signs of gopher activity. Repair or replace as needed.
5. Combine with Other IPM Practices: Gopher netting is most effective when used in conjunction with other IPM strategies such as crop rotation, companion planting, and maintaining a healthy soil ecosystem.
6. Grid System: Divide your garden into smaller sections or plots, each covered with gopher netting. This modular approach makes it easier to manage and replace netting if needed.
7. Raised Beds: Consider using raised beds with gopher netting lining the bottom. This not only provides protection from gophers but also improves drainage and soil quality.
8. Plant Selection: Opt for plants that are less attractive to gophers. While gophers may not have a strong aversion to certain plants, they tend to avoid plants like daffodils, fritillarias, and castor bean plants.
9. Natural Predators: Encourage natural predators of gophers, such as snakes, owls, and raptors, to inhabit your garden. Provide nesting boxes or habitat to attract these beneficial animals.
10. Vibrating Rodent Repellents: Invest in solar-powered vibrating rodent repellent devices. These emit vibrations that deter gophers from tunneling in the protected area.
11. Monitoring: Regularly inspect your garden for signs of gopher activity, such as mounds of soil or damaged plants. Early detection allows for quick intervention.
12. Bait Stations: If you have identified specific gopher tunnels, you can place bait stations in these areas. However, exercise caution and use this method sparingly to avoid harming non-target wildlife.
13. Companion Planting: Integrate gopher-resistant plants with your valuable crops. For example, planting marigolds, which gophers dislike, alongside your vegetables can provide some protection.
14. Garden Barriers: Use gopher netting in conjunction with other physical barriers like hardware cloth or wire mesh to create a comprehensive defense against gophers.
15. Mulching: Apply mulch around the base of your plants. While not a direct deterrent to gophers, mulch can make it more difficult for them to dig into the soil.
16. Regular Weeding: Keep your garden beds free of weeds, as gophers may use weed cover as a hiding place and a food source.
17. Community Effort: Coordinate with neighboring gardeners to implement gopher control measures collectively. Gophers don't respect property boundaries, so a collaborative approach can be more effective.
18. Education: Educate yourself and your gardening community about gopher behavior and IPM practices. Sharing knowledge and experiences can lead to better pest management.
19. DIY Gopher Baskets: Craft gopher-proof wire mesh baskets to protect the roots of individual plants. Plant your seedlings or bulbs inside these baskets to deter gopher damage.
20. Native Plant Selection: Consider incorporating native plants into your garden design. These often have natural defenses against local pests, including gophers.
Remember that an effective IPM strategy often involves a combination of methods, as no single approach is foolproof. By incorporating gopher netting into your pest management plan and tailoring it to your garden's specific needs, you can enjoy a thriving garden while minimizing the impact of gophers and other pests. Happy gardening and successful pest management!
Transform your raised beds into comfortable seating areas where you can unwind, read a book, or chat with friends. Here are a few ideas:
Enjoy outdoor dining in your raised bed garden. Consider these options:
Make the most of your raised beds by incorporating garden games into the design:
The soothing sound of water can add a calming ambiance to your raised bed space:
Extend the usability of your garden into the evening with well-placed lighting:
Maximize space and add a touch of greenery by growing vining plants vertically:
Create quiet corners within your raised bed garden for peaceful moments:
Remember that the possibilities for turning your raised bed spaces into relaxation and entertainment hubs are limited only by your imagination. Feel free to mix and match these ideas to create a multifunctional garden that suits your personal style and preferences. Happy gardening and enjoying your outdoor haven!
]]>
Quality Raised Bed Kits and Raised Bed Edging
Starting with the basics, a high-quality raised bed kit is essential. These kits come in various materials such as cedar, composite, or metal, and they make setting up your garden a breeze. They provide excellent drainage and prevent soil erosion
Edging materials, such as wooden boards or stone blocks, help define and protect your raised bed. They prevent soil erosion, provide a clean aesthetic, and serve as a barrier against grass and weeds creeping into your garden.
Quality Soil Mix
A successful raised bed garden starts with the right soil mix. Invest in a high-quality blend of topsoil, compost, and organic matter to provide your plants with the nutrients they need. Ensure your soil mix is well-draining and retains moisture to promote healthy plant growth.
Mulch
Mulch helps maintain soil moisture, regulate temperature, and suppress weed growth. Choose organic mulch like straw or wood chips to protect the soil in your raised bed garden.
Drip Irrigation System
Efficient watering is key to a flourishing garden. A drip irrigation system provides a consistent water supply to your plant's roots, reducing water wastage and promoting healthy growth. You can set up a simple DIY system or opt for a more advanced automated one.
Garden Tools
A set of quality garden hand tools, including a trowel, hand fork, and pruners, will make planting, weeding, and pruning tasks much easier. Look for ergonomic designs for comfort during long gardening sessions.
Compost Bin
Composting is an eco-friendly way to recycle kitchen scraps and garden waste, creating nutrient-rich compost for your raised bed garden. A compost bin or pile near your garden ensures a steady supply of organic matter.
Pest Control Solutions
Keep unwanted pests at bay with organic pest control methods. Neem oil, companion planting, and beneficial insects like ladybugs can help protect your crops without harmful chemicals.
Support Structures
Depending on what you're growing, you may need support structures like trellises, stakes, or cages. These accessories provide stability and help maximize space for vining or tall plants. As your plants grow, they may need support to prevent them from toppling over. Invest in stakes, trellises, or cages to keep your plants upright and healthy.
Weather Protection
Extreme weather conditions can be detrimental to your garden. Invest in accessories like row covers, cold frames, or shade cloth to protect your plants from harsh sunlight, frost, or heavy rain.
Garden Labels
Labeling your plants is essential for organization and tracking. Use weather-resistant garden labels or markers to identify your crops, especially if you're growing different varieties of vegetables or herbs.
Keep track of your plant varieties with garden labels. Whether they're wooden stakes or reusable plastic tags, labeling your plants will help you stay organized and ensure you're giving each plant the care it needs.
A successful raised bed garden requires careful planning and the right accessories. By investing in quality soil, irrigation, garden tools, and protective measures, you can create a thriving and productive space for your plants. Whether you're a seasoned gardener or a beginner, these top 10 must-have accessories will help you maintain a beautiful and bountiful raised bed garden year-round. Happy gardening!
]]>How to Choose the Ideal Site for Your Raised Bed Garden
Before you start shopping for raised bed garden products, you need to determine where your garden will be located. Factors to consider include sunlight exposure, drainage, and proximity to your water source.
Selecting the Right Material
One of the first decisions you'll need to make when creating a raised bed is the material for the bed itself. There are several materials to choose from when it comes to building your raised bed, including wood, metal, and composite materials. Each has its advantages and drawbacks.
Wood: Cedar and redwood are popular choices due to their natural resistance to decay and insects. Another choice is pressure-treated lumber, although it might include chemicals that can seep into the ground. If you opt for treated wood, consider using a barrier to prevent soil contact with the wood.
Composite: Composite materials like recycled plastic or wood-plastic composites are durable and low-maintenance. They won't rot or warp but can be more expensive upfront.
Metal: Galvanized steel or aluminum beds are long-lasting and provide a sleek, modern look. However, they can heat up quickly in direct sunlight, potentially affecting plant roots.
Concrete or Stone: These materials create permanent, long-lasting beds. They are excellent choices for a more formal garden design but can be costly and labor-intensive to install.
Choosing the Right Size and Shape
The size and shape of your raised bed will depend on factors like available space, your gardening goals, and your physical limitations. Here are some considerations:
Size: A common mistake is making raised beds too wide, making it challenging to access the center without stepping on the soil. Opt for a width that allows you to reach the center comfortably, usually no wider than 4 feet. Length can vary depending on your space.
Height: The height of your raised bed should accommodate the root depth of your chosen plants. Most raised beds are between 6 and 12 inches tall, but deeper beds may be necessary for crops with extensive root systems like carrots or potatoes.
Shape: Raised beds can be rectangular, square, or even curved. The shape should complement your garden's layout and aesthetics.
Selecting Quality Soil and Amendments
The quality of your garden soil is critical to the success of your raised bed garden. Start with a good-quality garden soil mix that is well-draining and nutrient-rich. Consider adding compost or other organic matter to improve fertility and soil structure.
Irrigation and Drainage
Proper irrigation and drainage are crucial for raised bed gardens. You can choose from various irrigation options, including soaker hoses, drip systems, or even hand watering. Ensure that your chosen method is compatible with your bed material and garden layout.
To prevent waterlogging, raise your raised bed slightly and use well-draining soil. If your area experiences heavy rainfall, consider installing a drainage system, especially if you have deep beds.
Mulch and Garden Accessories
To maintain and care for your raised bed garden, you'll need a set of essential tools and accessories. Mulching your raised bed can help conserve moisture, regulate soil temperature, and reduce weed growth. Organic mulches like straw, wood chips, or compost can be excellent choices.
Additionally, consider adding garden accessories like trellises, stakes, or cages to support climbing plants, protect your crops from pests, and maximize your garden's productivity.
Personalized Garden Tools
Lastly, invest in the right garden tools, tailored to your raised bed's size and your gardening style. Hand trowels, pruners, and weeding tools are essential for maintaining your raised bed garden efficiently.
Creating a thriving raised bed garden begins with selecting the right products and materials. From choosing the best material for your bed to selecting the right soil, irrigation, and garden tools, every decision you make will impact your garden's success. With the information provided in this ultimate guide, you can embark on your raised bed gardening journey confidently and create a lush and productive garden space to enjoy for years to come.
]]>The Magic of Garden beds Art Projects
Personal Expression: Garden art projects provide an opportunity for children to express themselves in a unique and personal way. Whether it's painting rocks, designing plant markers, or crafting sculptures, kids can infuse their personality into every piece of garden art.
Connecting with Nature: These projects deepen a child's connection with nature as they engage with the garden's colors, textures, and natural materials. It encourages them to see the world around them in a new and imaginative light.
Learning Through Play: Garden art projects seamlessly blend education with play. Kids can learn about plants, insects, and the environment while having fun creating art.
Building Confidence: As children see their creations displayed in the garden beds, they gain a sense of pride and accomplishment. This boost in self-esteem can encourage them to explore their artistic talents further.
Ideas for Garden Art Projects
Painted Rocks: Collect smooth, flat rocks from the garden or a nearby riverbed and let kids paint them with vibrant colors and imaginative designs. These painted rocks can serve as garden markers or decorative elements.
Garden Sculptures: Use found objects like driftwood, discarded metal, or old ceramic pieces to create unique sculptures. Kids can assemble these materials to form whimsical characters or abstract shapes.
Garden Mandalas: Arrange flowers, leaves, and other natural materials into intricate mandala patterns on the ground. This temporary garden art project allows kids to experiment with symmetry and design.
Birdhouses and Feeders: Encourage kids to build and paint birdhouses or bird feeders. Hanging these in the garden not only provides a practical purpose but also attracts local wildlife for kids to observe.
Nurturing Creativity in Young Gardeners
Provide a Creative Space: Dedicate a corner of your garden for art projects. This can be a small table or a designated art wall where kids can display their creations.
Access to Supplies: Keep art supplies easily accessible. Provide a variety of materials like paints, brushes, markers, glue, and recyclable items for upcycling.
Inspire with Nature: Encourage children to draw inspiration from their natural surroundings. Take garden walks, observe the plants and wildlife, and discuss how these elements can be incorporated into their art.
Celebrate Their Work: Display their garden art prominently. Whether it's a collection of painted stones or a garden sculpture, showcasing their creations will boost their confidence and enthusiasm.
Garden art projects are a delightful way to nurture creativity and self-expression in young gardeners. They bridge the gap between the natural world and the world of imagination, allowing children to explore their artistic talents while appreciating the beauty of their garden. So, roll out the art supplies, venture into the garden, and watch as your young gardeners transform their creativity into stunning garden masterpieces. The result, A garden bed that's not just full of life but full of heart and soul.
]]>Understanding Hugelkultur:
Hugelkultur, which translates to "hill culture" in German, involves the creation of raised garden beds filled with a mixture of organic materials such as logs, branches, leaves, and compost. These materials decompose over time, providing a consistent source of nutrients for plants and improving soil structure.
Benefits of Hugelkultur:
1.Improved Soil Fertility: As organic matter decomposes, it releases nutrients into the soil, enriching it naturally. Hugelkultur beds can remain fertile for several years without the need for synthetic fertilizers.
2.Water Retention: The organic materials in hugelkultur beds act like a sponge, retaining moisture and reducing the need for frequent watering.
3.Enhanced Aeration: The decomposition process creates air pockets in the soil, improving root oxygenation and promoting healthy plant growth.
4.Weed Suppression: The raised beds and dense organic layers discourage weed growth, reducing the need for weeding.
5.Sustainability: Hugelkultur is a sustainable gardening method that recycles waste materials and reduces the environmental impact of conventional gardening practices.
Building Your Hugelkultur Bed:
1.Choosing the Location: Select a sunny or partially sunny location for your hugelkultur bed.
2.Gathering Materials: Collect logs, branches, leaves, straw, and compost. Consider using woody debris from your own property or local sources to minimize environmental impact.
3.Layering: Start with logs or large branches as the base layer, followed by smaller branches, leaves, straw, and finally, a layer of quality compost.
4.Shaping and Planting: Shape the bed to your desired dimensions, mound shape, or terrace form. Plant a variety of vegetables, herbs, and flowers directly into the hugelkultur bed.
Maintenance and Care:
1.Watering: Hugelkultur beds require less frequent watering due to their moisture-retentive properties. Water deeply when needed, especially during dry spells.
2.Mulching: Apply a layer of mulch to conserve moisture, suppress weeds, and regulate soil temperature.
3.Adding Compost: Periodically add compost to replenish nutrients as the organic materials break down over time.
4.Crop Rotation: Practice crop rotation to maintain soil health and prevent disease buildup.
Success Stories and Tips:
1.Learn from experienced hugelkultur gardeners who have successfully implemented this method in various climates and regions.
2.Experiment with different plant combinations and observe which crops thrive in your hugelkultur beds.
3.Keep a garden journal to track the progress of your hugelkultur garden and make adjustments as needed.
Plant Selection for Hugelkultur Beds:
Extended Growing Seasons:
Biodiversity and Ecosystem Benefits:
2.The decomposition process in hugelkultur beds contributes to a healthy soil food web, enhancing overall ecosystem health in your garden.
Building Community and Sharing Resources:
Sustainability and Resource Conservation:
Educational Opportunities:
Monitoring and Adaptation:
Hugelkultur gardening is a dynamic and sustainable approach that continues to evolve and adapt to the needs of gardeners and the environment. Its benefits extend beyond the garden, offering opportunities for community building, education, and resource conservation. By embracing hugelkultur, you not only create a thriving garden but also contribute to a more resilient and sustainable future. So, roll up your sleeves, build your hugelkultur garden beds, and embark on a gardening journey that combines tradition, innovation, and a deep respect for the natural world.
]]>Spring: The Season of Renewal
Spring marks the beginning of the gardening season in many regions. It's a time of renewal, when nature awakens from its winter slumber. Here's what you should focus on during spring:
Summer: The Season of Growth
Summer is when your garden is in full swing, with plants growing vigorously. Here's how to make the most of this season:
Fall: The Season of Preparation
As summer gives way to fall, it's time to prepare your garden for the coming winter. Here's what to focus on:
Winter: The Season of Rest
While winter may seem like a time when your garden sleeps, there are still essential tasks to consider:
Understanding the seasonal nuances is essential to having a successful garden because gardening is a year-round endeavor. You can have a lovely and fruitful garden that resembles the natural rhythms of nature by adhering to this seasonal pattern for planting and care. Enjoy your garden!
]]>