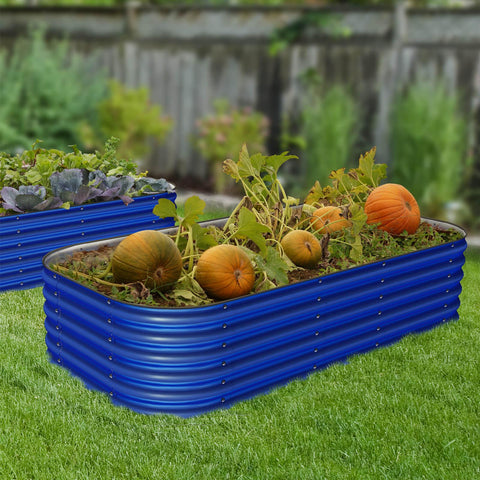
5 Tips from Olle Garden Bed for Growing Butternut Squash at Home
Butternut squash is a winter squash that grows throughout the spring and summer to be harvested in the fall. There are many varieties you can plant, from "Honey Baby" to "Honey Nut" to "Cream Candy," just to name a few. If stored properly, butternut squash has a long shelf life and can last for several months. It's an excellent crop if you want to extend your garden harvest into late autumn and store food throughout the winter. The following content also has some reference value for raised garden beds.
Discover these five tips for successfully growing butternut squash in your home garden. Learn about the proper planting requirements, when to harvest, how to cure the winter-stored squash, and more!

1.Choose the Right Planting Location
Butternut squash needs a spot in your garden that receives plenty of sunlight (six to eight hours a day). These trailing plants will stretch and grow along long vines, so choose a location with enough space. Butternut squash typically needs 50 to 100 square feet to spread out. However, some varieties, like "Honey Baby" or "Honey Nut," grow more compactly, making them well-suited for smaller spaces. Alternatively, you can install a large trellis to let your squash grow up and support it to maximize your garden space.
Butternut squash cannot tolerate colder temperatures. Directly sow the seeds after the last frost of spring when outdoor temperatures reach 65 to 70 degrees Fahrenheit. Plant the seeds 1 inch deep, leaving 2 to 3 feet between the plants to accommodate their trailing growth habit. Alternatively, plant them in rows with 3 to 6 feet of spacing between the hills. Planting on mounds or hills increases soil temperature and drainage.
2.Water Regularly and Apply Mulch
Butternut squash prefers well-draining soil to thrive in the garden. The soil should be rich in nutrients, moist but not soggy. This type of plant requires plenty of water, needing about 1 inch of water per week. When watering, avoid wetting the leaves or fruits; instead, water directly at the base of the plants. The best time to water the plants is in the morning when the temperatures are cooler, and the sun isn't as intense.
To better retain soil moisture, mulch around the plants with a layer of 2 to 3 inches thick. Mulching around the squash can slow down water evaporation, suppress weeds, and regulate soil temperature. Additionally, butternut squash is a heavy fruit and sits on the ground as it grows. Mulching around the plants helps reduce the fruits' contact with damp soil. Use straw, leaves, wood chips, or grass clippings as mulch.
3.Fertilize the Plants
Regularly fertilize the butternut squash throughout the growing season. Before planting, incorporate a balanced fertilizer with a ratio of 10-10-10 into the top few inches of the soil. After the first flowers appear on your plants, fertilize again with a general-purpose organic fertilizer. Place 2 tablespoons of fertilizer into the soil, avoiding contact with the plant's stem, and then water thoroughly. Popular organic fertilizers include blood meal, bone meal, alfalfa meal, and compost.
If you're planting squash in rows, use a technique called side-dressing. Dig a shallow 2-inch trench 3 inches away from the plant. Apply several tablespoons of organic fertilizer, cover it with soil, and water the plant. When the squash begins to grow, fertilize again using the same technique with a ratio of 12-10-5.
4.Ensure Proper Pollination
It's essential to ensure that your butternut squash plants are properly pollinated to produce fruits. Butternut squash will produce two types of flowers, male and female. Male flowers will form and appear on the plant first, followed by female flowers with a tiny, immature fruit behind them. To produce plenty of squash, the male flowers need to pollinate the female flowers.
Poorly pollinated plants will not bear fruit or produce small squash. To ensure proper pollination, plant a variety of flowers to attract beneficial pollinators like bees and insects into your garden. Alternatively, you can manually pollinate by using a brush or cotton swab to transfer pollen from the male flowers to the female flowers.
5.Harvest and Cure the Butternut Squash
Harvest butternut squash when the fruits reach full size, which is approximately 100 to 120 days after sowing. The squash is ready to harvest when the vine turns brown, the stem dries out, and the skin feels firm to the touch. The fruit should be between 2 to 3 pounds and have an orange or tan color. When harvesting, use a sharp pruner and cut the squash from the stem, leaving a few inches of stem intact. Do not carry the harvested fruit by the stem, as it needs to remain intact for proper curing.
Next, you'll need to cure the butternut squash before storage. This process helps harden the skin, prevents bacterial or fungal formation, and allows the squash to last for up to six months. To do this, place the squash in a warm, dry area with temperatures between 80 to 85 degrees Fahrenheit. Choose an indoor or outdoor location with 80% humidity, as long as temperatures never go below 50 degrees Fahrenheit. Let the squash cure for 10 to 14 days. After curing, store the butternut squash in a cool place at 50 to 55 degrees Fahrenheit.

Enjoy the Delicious Sweetness of Butternut Squash
Growing butternut squash in your garden is a fun and rewarding experience that allows you to harvest and store multiple squash over the coming months. With regular care and fertilizing, butternut squash will be ready for harvest in late September to October. Enjoy its nutty, sweet flavor in a variety of soups, stews, and baked dishes, or roast it in the oven for a tasty treat.
