Knowledge from Olle Garden Bed: Simple Ways to Improving Soil
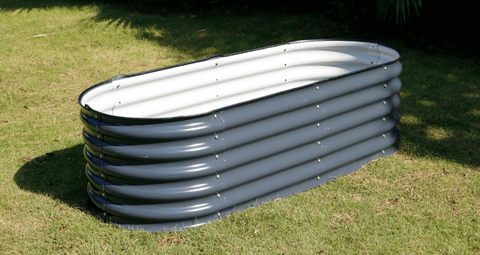
When I first started growing my own food, I dutifully started a three box composting system. I keep my brown and green in two of the boxes until I have the right amount of each. The following content also has some reference value for raised garden beds.
I mixed my compost ingredients in the proportion of about 1 green vegetable and 4 brown vegetables, added the compost inoculant purchased by the store, and watered my compost. Then, I turn over the pile of things every few days to speed up the decomposition.
A few weeks later, when I began to spread all those wonderful things on the bed, disappointment began. All these efforts have not even had an impact on my garden composting needs.
After that, I began to look for other ways to improve our soil on a larger scale. This is how I discovered and loved trench composting.
What is ditch compost?
I believe you know what a trench is - a row of large holes or holes dug in the ground.
I bet you know what compost is - it can decompose all kinds of kitchen waste, livestock manure, grass dust, weeds, leaves, cardboard, etc. into rich black humus to make your garden happy.
Well, when you put these two things together and compost in ditches, they add up to more than just a good way to compost. They provide many other benefits for your garden soil.
Benefits of Ditch Composting and Bin Composting
Ditch composting is labor-intensive. If you have rigid soil, even if you dig your trench, it will be really painful. In my heavy clay, I found that trenching was as much work as turning the compost pile over in a few weeks.
However, unlike bin composting, the more you dig ditches for composting, the easier it is. Because ditch composting can not only produce fertilizer, but also improve the quality of the soil around the ditch. Soil improvement through ditch composting is much more extensive than when composting is used to cover garden beds.
Trenching opens up the soil, allowing air and water to seep into your ditches and into the surrounding soil. When bacteria and other decomposers finish decomposing compost ingredients, they will enter the adjacent soil and spread the benefits out of the ditch. Because there are too many organic substances in the trenches, they also contain a lot of water.
During the drought, nearby plants will root in your trenches to find water. Plants growing near trenches will become more resistant to drought. These far-reaching roots also create more air and water spaces in the soil around the ditches, further accelerating soil improvement.
I know from experience that ditch composting can fundamentally accelerate the transition from soil to super soil. Now, let's learn more about how to start ditch composting on your homestead.
How to Ditch Compost
Personally, I like to dig ditches and compost when cleaning the chicken house or goat barn. Fresh excrement is an excellent green vegetable. Kitchen waste and seedless weeds are stored in 5-gallon buckets and are also ideal for use as green vegetables.
For brown, consider old hay, garbage in goat litter pots, and dirty nesting materials. The leaves of the fresh rake and the wood material under the tree are also incredibly brown. You don't need piles, just rake them when you need them. These leaves are partially decomposed and full of bacterial life, so they serve as compost inoculants for free!
After the materials are ready, it's time to dig ditches! Here are some of my favorite methods.
Method 1: Pit and ditch composting
Pit and ditch composting involves digging a deep hole, and you backfill everything you usually put in the compost pile, as well as some of the original soil you dig. You can use a column hole excavator every 2-3 feet in the yard to make small holes to improve the soil for planting flowers or grass. Or, you can make bigger holes where you plan to plant trees or shrubs.
In ditch composting, the ratio of brown to green does not need to be as precise as when trying to make a hot compost pile. You need to make sure you layer some brown, so you can leave air space between the green. The rotting kitchen residue will become heavy and anaerobic, and will not be layered between the two fluffy, dry substances.
For ditch composting, my goal is to use about 1/2 green and 1/2 brown. To be honest, I just use what I have. The sooner the ditch is filled, the sooner the soil begins to improve. So don't worry about the perfect ratio.
You can layer everything into the hole, just like making lasagna. A layer of green, a layer of brown, a layer of soil, and then start again. The top layer should be soil, piled a few inches above the ground. You can also mix everything together and throw it back into the hole.
Either way, place a few inches of dirt on the top of the hole to minimize potential pest problems. Stack some higher grade soil on the hole. When these compost ingredients break down, they become more compact. The mound will help ensure that you do not encounter real potholes in the middle of the yard.
I like to cover my pits with an inch or two of hardwood mulch to keep moisture and mark holes so that I can plant it later. I usually compost my potholes for several months before planting.
Or, if you want to plant immediately, backfill those top few inches with good potted soil (not soil). This will give your plant a good start until composting occurs.
Method 2: Ditch composting in vegetable garden
You can also ditch compost between rows or directly in the center of the bed to immediately add nutrients to your garden. The method is as follows.
- For plants with high nitrogen demand, such as cabbage and corn, dig a 5-6 inch deep and wide ditch in the center of the vegetable garden. The trenching shovel or drainage shovel is the perfect tool for the width of the trench.
- Fill the ditches with several inches of "hot" green plants, such as uncomposed poultry manure, kitchen residues, grass cuttings and semi decomposed hay.
- Cover the ditch with soil. Any additional soil that is not suitable for placing back into the trench can be spread over the bed.
- Water the ditch to activate decomposition.
- Plant on both sides of the ditch. Ensure that seeds and seedlings are at least 4-6 inches from the ditch.
-
Note: Compost materials such as poultry manure are considered "hot" because they contain a large amount of nitrogen. Similar to using store bought high nitrogen fertilizer, you cannot apply most of the fresh fertilizer around plants, or you will burn nitrogen to kill them.
By placing these thermal ingredients in ditches and covering them with soil, they will start composting quickly. When it rains, some nitrogen will seep into the surrounding soil, and soil residents (bacteria, worms, etc.) will also pass it through the soil.
As the plants grow, their roots begin to seek nutrients, and they will send their roots to the ditch area where nitrogen is loaded. If nitrogen is still too active for plants, the roots will grow in different directions until your ditches are fully composted. Compared with direct application, ditch fertilization is a safer way to provide nitrogen to plants.
Method 3: Composting ditches in garden paths
You can also use the same concept on the garden path. There are some differences in this process. For the path, you need to dig trenches about 8-10 inches deep and standard shovel width.
Excavate topsoil (if any) and place it on the bed, or use it in other areas where topsoil is required.
Excavate the subsoil that is not suitable for planting, and put it on the tarpaulin, in the bucket or in the trolley, which will be used to cover the trench later.
Fill about 3/4000 holes with any compost you have. Layered browns and greens work well in deeper trenches. Place kitchen debris at the bottom (to prevent pests from digging), and then place anything else on top.
Backfill the trench with the subsoil you have set aside.
Break up any large clay or subsoil block and rake it flat.
Water the ditch to activate the decomposition.
Optional: Cover the path with mulch to minimize weeds and prevent them from becoming muddy due to rain.
For potholes and bed ditch composting, you usually leave the compost in place and let it feed the area for a long time. However, when your channel has been composted, you have several choices about how to use compost.
First, you can leave the compost in place. Similar to pothole compost; Eventually, good things from the ditches will seep into your garden bed or be moved by biological life in the soil.
Second, you can dig it out, spread it on your bed, and reuse the ditch to make more compost. You may need to dig deeper to get some new subsoil to cover your trench.
Third, you can plant in your ditches and move your path. Some people cultivate whole gardens row by row, constantly renovating their beds and growing incredible vegetables. My garden is a bit too big, but I can see it working on a small piece of land.
You can also cover the trench with planks and concrete blocks to prevent digging dogs until composting begins. However, underground diggers like rats are more difficult to stop.
Wide World of Composting Technology
As a self-employed farmer, managing the richness of the garden area is still one of the most difficult things. Having a range of different methods to compost and improve soil is a crucial homestead skill. I still use compost bins to make covers for new garden beds. I also use worm beds to make compost tea, and use ducks to make compost directly in growing areas.
Like these other methods, ditch composting is an extraordinary skill that can be used regularly. I hope you can try!