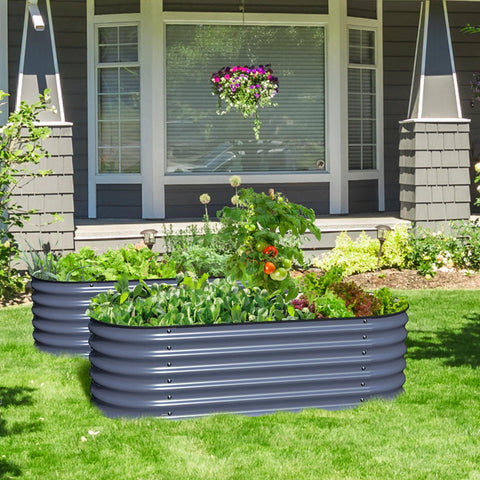
Knowledge from Olle Garden Bed:The Difference Between Hot, Cold and Warm composting?
Do you know hot, cold, and warm compost? Well, you will learn more about three methods for all contents, and how to use each method to improve the soil of the garden, so that it is easier to plant healthy and happy plants in each growing season. The following content also has some reference value for raised garden beds.
Composting is the recycling practice of decomposing substances (such as kitchen food residues) and converting them into organic rich gardening soil, or excellent soil conditioner for your garden to supplement the nutrient season lost during each planting process. What happens in the compost pile is a direct result of several factors: what you put in, the method you choose to use (hot, cold or warm), the size of the pile itself, the weather in your area, and how often you mix and keep the pile. All these things will affect your speed and can turn your garbage into gold in the garden.
Another important factor to consider is that smaller pieces, such as shredded food waste, shredded leaves and broken wood, decompose faster than large pieces of wood, complete leaves and food waste. These food waste are simply thrown in without being decomposed a little in advance. Almost everything made of organic matter can be composted. You might be surprised at everything you can add to the compost heap.
Hot composting is a quick way to flip your waste into nutrient rich soil, but it also requires more attention and maintenance than cold composting. The cold composting method requires very little effort to create and maintain, but it takes a lot of time before the mixture will decompose enough to function in your garden beds.
Both methods have their advantages and disadvantages, but the composting problem is easy to solve. Some gardeners vowed to use hot compost, while others insisted on a simpler (but longer) method of cold composting. Many gardeners have hot compost and cold compost. Warm (or mixed) compost is located between these two methods and has become more and more common in recent years.
However, no matter which method you choose, the final result is worth the time and effort, because you are creating a powerful and powerful dose of nutrients to let your plants thrive. Mix the soil of the final result into the garden to provide your garden with the nutrients needed to produce healthy new plants in the coming season. Read more to find out what works for you, and get started now. The sooner you start to recycle your food waste, the sooner you can improve the soil in your garden. As time goes by, nutrients will naturally be lost.
Hot compost
The fastest way to make healthy batches rich in garden humus is by creating a hot or active compost heap. Hot composting can reach temperatures up to 160 ° F, but the ideal temperature range is about 110 ° F to 140 ° F. At this heat level, pathogenic organisms and weed seeds cannot survive. The size of the pile, the ingredients used and the layered arrangement of ingredients will have an impact on the success or the failure of the hot composting setting.
Hot Composting – Size
The perfect size of the heatpack is a four foot cube, but a three foot cube can also solve the problem, especially for smaller garden spaces. When you prepare a hot compost heap, add a lot of decomposed organic matter, and the pile will become larger. As compost begins to decompose under high temperature, piles will begin to shrink, forming a garden rich humus, allowing your garden to flourish year after year.
Hot Composting – Composition
Two thirds of the ingredients that should be added to the soil foundation should be composed of high carbon materials such as dry, chopped leaves, small pieces of wood (such as branches and stems) and corn cobs.
One third of the soil mixture shall be green plant material with high nitrogen dosage. Make this mix yourself by simply combining small pieces of grass, weeds, plants, vegetables, leftovers and kitchen waste (except fat, meat and dairy products).
Standard high-quality potted soil (addition of basic materials with high carbon and nitrogen components) is the only other component required to start the hot composting system.
Hot Composting – Preparation
Make your compost cube (or box) inside a layer of ingredient cake. Start with a layer of high carbon material at the bottom of the container. The best high carbon materials for the bottom layer are branches and wooden stems, which will help to inflate the pile. Add a layer of soil on the top of the carbon rich layer. The third layer should be a high nitrogen layer, plus a layer of soil. Repeat these layers until the pile is two to three feet high.
Hot Composting – Maintenance
Immediately after that, soak the compost heap with water. You create the heap, and continue to occasionally water the bin, keeping the overall consistency like a wet sponge. You want your hot composting system to stay slightly moist. Avoid excessively dry or wet fluff and know when to add water and when to delay. To check the compost moisture level, stick one finger into the soil about an inch deep. If the pile is too dry, add water. If the mixture is still wet, please put it off slightly before watering.
Inflate the sides by drilling holes in the compost pile, or by inserting a one to two foot hollow tube into the center of the compost. If your compost starts to stink, it may be because it needs more air. Try flipping the pile to remove the fashionable smell. Bad smell may also be caused by incorrect ingredients. If you add any meat, fat or dairy products, take them out and discard them elsewhere.
Occasionally check hemorrhoid temperature using an old kitchen thermometer or compost thermometer (if any). The ideal temperature range is 110 ° F to 140 ° F. If your composting system is not hot enough, add more high nitrogen materials, such as organic fertilizer from garden plants or soft green decorations.
Once a week, or when you notice the center, your hot compost begins to cool, rotate the compost, and move the material from the inside to the outside edge. If you want to be able to use your nutrient rich humus within a month, you will want to turn over your compost heap every few days. If you need compost available within one to three months, please pile it every other week.
Cold compost
Cold composting uses many of the same ingredients as hot composting, but requires less attention and longer decomposition periods. Many gardeners prefer the cold composting method because it requires less effort and maintenance to create the garden humus produced by the same nutrient rich hot compost. The decomposition process when used However, the cold composting method takes longer. Available soils made from cold composting systems take about a year to mature and can sometimes take up to 18 months.
Cold Compost – Size
Although hot composting requires three to four foot cube functions, cold composting can be large or small as long as it is not too large to stir the mixture when needed.
Cold Composting – Composition
Organic materials – leaves, grass litter (to avoid weeds), soil, excrement (but not dog, cat or human excrement)
Kitchen residue (avoid meat, dairy products and fat)
Coffee grounds and used tea bags (tear the tea bags when adding them to the pile)
Dry goods (flour, spices, biscuits, etc.)
Eggshell
hair
Hard shell
Pasta (cooked or undercooked)
seaweed
Shredded paper/newspaper (avoid newspapers with color images, because color ink may be toxic)
Cold Composting – Preparation
Accumulate organic materials and stack them in your compost bin. The kitchen waste is buried in the middle of the pile to hide it from scavenger animals and insects that may interfere with the compost.
Cold Composting – Maintenance
Once a month, mix and turn over the compost pile and mix the new organic materials you have collected.
Warm compost
Warm composting is a better balance between the two more common hot and cold methods. The warm compost heap should not be neglected or spoiled, but it should be taken care of once every two to three weeks.
Build your own warm composting system, as if you are building a hot pile, but add the same amount of brown and green materials, then mix and water the mixture until it blends perfectly. The water turns the warm pile every few weeks. Allow 8 to 14 weeks for your garden beds and container.
Each composting method has advantages and disadvantages. Which one is right for you? Well, you don't have to know the answer yet. Try each method and see for yourself. In addition, why only one? Consider trying each of these methods to decide which one (or more) you prefer. After all, before each growing season, you will never have too much nutrient rich soil to modify your garden. More compost piles equals more compost.