How to Make Your Own Garden Bed Fertilizer for Free
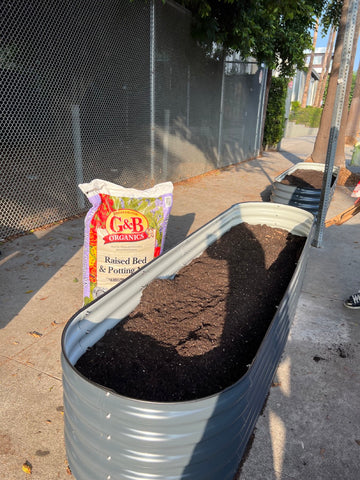
If your garden bed needs a touch of personal style, DIY fertilizers are the way to go. Fertile soil is crucial for a beautiful and thriving garden bed. Since garden beds require fertilization every season, it can be financially inconvenient to obtain the exact amount and type of fertilizer needed for your garden's well-being. Not to mention, if you move to a different location, you may not be able to find the fertilizers you used before moving. The availability of fertilizers, the size of your new garden, and the convenience of purchasing play a significant role in ensuring your garden's needs are met each season.
Let's not forget that buying organic fertilizers over time can be an expensive endeavor. We may not realize it now, but making your own garden fertilizers for free can benefit us for a lifetime! Did you know that in 2020, US farmers spent $2.4 billion on fertilizers, lime, and soil conditioners on average? Also, homemade DIY fertilizers are organic and free from chemicals, which means they are environmentally friendly. With DIY fertilizers, you don't have to worry about hidden ingredients or rely on external factors to help your garden thrive.
Finally, after conducting soil tests, you can easily adjust the nutrients you know your soil lacks. You can seek professional assistance or use DIY household items.
What You Need to Make Your Own DIY Fertilizer
You can make several different types of fertilizers at home. The most popular ones are compost tea fertilizer, coffee ground fertilizer, ash fertilizer, Epsom salt fertilizer, eggshell fertilizer, and banana peel fertilizer. Each of them requires different things, which we will list below.
Compost Tea Fertilizer:
Several handfuls of compost
One 5-gallon bucket of water
Coffee Ground Fertilizer:
Used coffee grounds
Coffee filters
Spray bottle
Ash Fertilizer:
Wood or coal ash from a furnace or fireplace
Epsom Salt Fertilizer:
Epsom salt
Spray bottle
Eggshell Fertilizer:
Some eggshells
Mortar and pestle
Microwave
Banana Peel Fertilizer:
Banana peels
Blender
Spray bottle
All of these are easy to prepare, typically using items you already have at home and are not difficult to find or expensive to purchase. They are environmentally friendly and won't cause harm to anyone!
How to Make DIY Fertilizer
Compost Tea Fertilizer:
1.Take some compost and wrap it in an old shirt or cloth, then tie it up.
2.Place the "tea bag" you made into a bucket of water for a few days.
3.Remove the bundle after some time.
4.Water your plants with the liquid.
This fertilizer can be used every 14 to 30 days.
Coffee Ground Fertilizer:
1.Take out the coffee grounds and wrap them in a cloth or use the filter as a whole.
2.Place the wrapped grounds into a bucket filled with one gallon of water.
3.Wait for one to two hours.
4.Water your plants with the liquid.
Pro tip: If you don't want to wait and go through all this trouble, simply pile them near your plants as top dressing. Also, remember that coffee grounds are not suitable for tomatoes, peppers, and clover!
Ash Fertilizer:
1.Scoop out all the ashes from your stove or fireplace.
2.Put a layer of approximately 2 inches thick on top of your flower beds.
3.Work it in with your hands, a rake, or a shovel.
Pro tip: Use 9kg of wood ash per 1,000 sq ft. of soil. Remember to spread the ashes evenly as a concentration of ash can cause a buildup of salt that can burn plants. You can sprinkle ash upon each layer of compost you add to your soil.
Epsom Salt Fertilizer:
1.Dissolve some Epsom salt in water. The optimal ratio is one tablespoon per gallon of water.
2.Water your plants with the solution.
Pro tip: You can also use Epsom salt as a solid fertilizer. All you have to do is sprinkle it in a ring around the stems of the plants. However, ensure that there is at least a 4-5 inch distance between the salt and the stems, as salt can burn the stems and roots of plants.
Eggshell Fertilizer:
1.Rinse the shells with warm running water and remove any residue.
2.Place the shells in the microwave. Make sure not to put more than six at a time.
3.Microwave the shells for one minute to ensure they are dehydrated.
4.Crush the now-dry eggshells into a powder using a mortar and pestle.
5.Use the powder as top dressing around your plants or mix it with water and water your plants.
Pro tip: Eggshell fertilizer is beneficial for root vegetables. Tomatoes, peppers, and eggplants especially enjoy the calcium and phosphorus found in eggshells. Eggshell fertilizers can be reused.
Banana Peel Fertilizer:
1.Microwave the banana peels. Do this every 30-50 seconds until they are dry.
2.Check if they are properly dried by bending them. If they break, they are ready. If not, give them another round in the microwave.
3.Put the dried peels in a blender and blend them into a powder.
4.Mix the powder with water if you want liquid fertilizer and water your plants with it. If you want solid fertilizer, apply it to the soil next to your plants.
There's another method to produce banana peel DIY fertilizer that is a bit time-consuming but equally effective. The process is as follows:
1.Take a bucket according to how many banana peels you have.
2.Fill it with banana peels, almost up to the edge.
3.Add water to cover the peels. Make sure all the peels are covered with water; otherwise, the formation will be disrupted.
4.Leave it out in the sun for approximately a week.
5.After the time has passed, you'll see the water now looks somewhat like tea.
6.Dilute the liquid four times the amount of fertilizer and water your plants.
Pro tip: Ensure all stamps and stickers are removed from the banana peels as they can be harmful to your garden. You can give your plants "banana tea" once a week as an option.

We hope this tutorial has been helpful to you and has inspired you with ideas on how to make your own DIY fertilizers at home. It is not only beneficial for our environment but also helps us save money. DIY fertilizers are easy to make, and you don't need to rely on external resources to keep your garden happy.