Tips from Olle Garden Bed: Earthworm Composting: A Complete Guide to Creating and Maintaining a Compost Worm Box
As Everett Gardeners know, composting is a very useful thing. In other words, they are not suitable for everyone. Gardeners with an unsuitable climate - or with limited space - may find themselves unable to maintain the compost heap. A simple solution is earthworm composting. The following content also has some reference value for raised garden beds.
Earthworm composting or worm box retention allows you to easily compost indoors, turning kitchen residues and green garbage into fertile dark soil, such as a substance called earthworm dung (worm casting). In addition to being an effective way to dispose of waste, this type of worm composting has many benefits.

Benefits of earthworm composting
Earthworm dung is rich in nutrients and microorganisms, which can enrich and improve your soil exponentially. For example, adding it to heavy clay will improve aeration and drainage. In addition, it can improve the water retention of excessive sandy soil. When mixed with potted soil or used as topdressing, Vericomposite is a reliable method for natural rejuvenation of plant growth.
Earthworm composting is a simple and beneficial process that not only reduces waste, but also helps improve your garden. The following is all the information you need to know about starting your own worm box.
What do you need?
Earthworm composting requires a stable supply of green waste. You also need a worm box (basically a house), worms (a red wiggler is ideal), and bedding.
Select your worm box
A good worm box should be efficient and easy to use. In addition, the size of the trash can will depend on how much compostable waste your household produces. Households that generate large amounts of garbage will be able to maintain a larger bin, or two medium-sized bins.
Your dustbin should also have good ventilation and drainage, because the production of rich earthworm dung is an aerobic process. The better the aerobic conditions are, the richer the compost will be. Finally, there should be enough floor space for your worm to move around happily.
Business and DIY
There are many worm boxes on the market. These range from simple ventilators to more complex stacking boxes. Stacked worm boxes with layered pallet systems make it easy to harvest earthworm dung. Each pallet can be used continuously because the top pallet is removed and the bottom pallet will start to fill. The design of the tray also allows worms to migrate from one level to the next, following food waste through the trash can.
Successful earthworm composting does not require complex and expensive houses. Worms will happily inhabit even the most basic containers. You can make your own by drilling in several 5-gallon barrels and stacking them on top of each other.
Red swinging worm
The most commonly used worm, the red wiggler, is highly praised for its efficiency. A red wiggler weighs about 0.6g and eats the waste equivalent to its own weight in one day. At least 50% of the waste will become earthworm dung. The red wiggler worm is also quite cold resistant, lives under many different feeding conditions, and is very happy in captivity.
You should have a pound of worms (about 1000) per day that produce the right amount of waste per pound. Remember that worms multiply and multiply rapidly. In a few months, the number of worms may be twice that of the beginning. If you are not sure about the number, I suggest you start with fewer worms than you think you need.
Worm box location
Worms are sensitive to light and noise. Therefore, the quiet corner of the wine cellar or garage is usually the best location. The temperature should be between 55-77 ° F, because anything outside this range will slow down the production of your worm or harm it.
These wavering friends will also be disturbed by vibration. If they are exposed to a lot, they may try to escape the dustbin. Do not put it near any washing machine, dryer or dishwasher.

Start your earthworm compost box
With the worm box, you need to add bedding.
The easiest way is to use the contents of another worm box. This ensures a hospitable environment rich in microorganisms, which is essential for a healthy ecosystem. The mixture of 25% earthworm dung and 75% new bedding from another dustbin created perfect conditions.
Old horse dung is also a good bedding. It is rich in microorganisms, contains a healthy mixture of carbon and nitrogen, and does not need to be mixed with earthworm dung. Your worms will also be able to handle feces, further enriching your soil. The disadvantage of horse dung is that it may contain rocks, weeds and other things that cannot be processed.
Bed type selection:
For the horse manure bed, you need enough horse manure to create an 8-inch deep layer in the trash. Spray the stool until it feels wet, but not too wet. A wet bed is critical because worms cannot survive in a dry environment.
If you do not want to use horse dung or earthworm dung, please use paper and corrugated board. Cut the paper into thin strips and soak for 24 hours. Twist the saturated material to make it feel like a damp sponge, and then put it into the dustbin.
If you are using paper, you need to simulate an ecosystem. (Feces and earthworm dung have their own ecosystems. To do this, add a small amount of:
Soil
Sand or limestone
Dead or compost leaves
This produces a mixture of matter and texture, all at different stages of decomposition. You also need to add things that break down, such as apple kernels or banana peels. When it decomposes, it adds microorganisms to the bedding.
Add worms after decomposition.
How to successfully add worms
Dig a shallow depression in the bedding, and then put the worm into it. Place the lid slightly on the dustbin in low light. This encourages the worm to start burrowing into the bedding.
Let the worms settle down for about a week before starting feeding. Burying food in bedding encourages worms to deal with it. The food scattered on the top will not be touched by worms and will begin to rot. The items you can and cannot put into the worm box are similar to the items you can and cannot add to the compost heap. Basically, if it doesn't decompose, you can't compost it.
After a week, check whether the worm is eating food. If so, you can now add more food to the trash.
The number and frequency of worms you need to feed will vary. A larger dustbin, with more worms, will handle more food in a smaller dustbin. Generally speaking, you need to feed your worm every few days. If you are unsure, remember that underfeeding is less harmful than overfeeding.
If you find yourself lacking the right worm food, organic corn flour is the ideal choice. If you want to leave for a few days and can't feed your worms, you can also add corn flour to the trash.
Although worms do not need new bedding as often as they need food, it is important to keep adding materials. Items such as leaves, shredded paper or cardboard, and wood chips are ideal.
Make your worm happy!
When you continue to feed and care for worms, please pay attention to those worms that move around the dustbin and attack food pockets. This is a sign of their happiness. Worms curling up in the corner of the trash can or worm escaping indicate that your trash can is not a healthy environment.
Happy worms will also begin to breed, so the presence of cocoons is a positive signal. The same is true of other creatures. Finally, a healthy worm box should have an earthy smell, not a stench.

How to harvest and use earthworm dung
When the contents of the worm box are processed into earthworm dung, it is time to harvest castings and provide new bedding for your worms. How often you need to harvest castings depends on how many worms you have and how much they eat.
The easiest way to harvest castings is to move everything to one side of a pallet or box. Then push any partially composted food into the middle of the tray. Add new scrap and material to the pile and replace the cover. Worms will go to this pile.
After two weeks, you will be able to remove the casting without accidentally removing any worms. After harvesting earthworm dung, give your worms fresh bedding.
Use earthworm dung
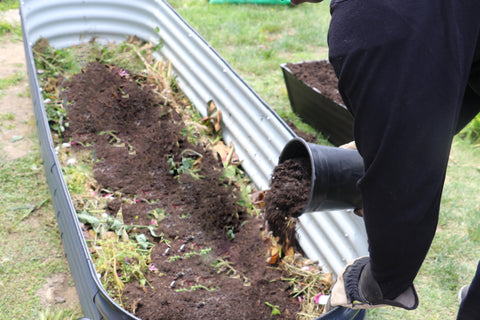
The simplest way to use earthworm dung is simply to mix it with the soil. If the elevated bed is to be filled from the beginning, mix the casting with the soil in a ratio of 1 casting to 2-4 soil. You can also use a manual spreader to spread earthworm dung on the area you are planting.
Finally, some people like to brew the castings into compost tea. Then, you can spray it on the garden to make your casting go further. This will also form a protective barrier outside the plant to prevent disease and pests.
With proper care and attention, your worm box will soon generate a stable "black gold" supply. Earthworm composting is not only good for your plants and gardens, but also a good way to reduce green waste by maintaining one or two worm boxes. In fact, a mature worm box is an easy to maintain and beneficial supplement for any family.
