Garden Bed Tips: How to Install a Raised Garden Bed Better
If you're wondering how to build a garden with a raised bed, you've come to the right place.
Bonus tip: It's best to choose a nice weekend to get some fresh air while building your raised garden beds.
Outside, if you find yourself babysitting a few toddlers, you can attract them with bubbles. If you're lucky, they don't pour all the bubbles on their clothes and each other's hair! If you're not that lucky (as in our case), you need to take a break and go wash off all the soapy water before they doze off.
Back to garden beds. There are many different types of loft beds, which we'll cover in detail here.
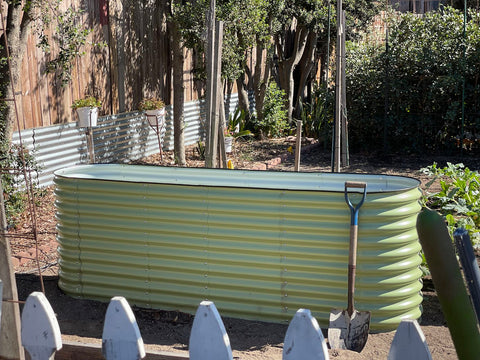
In this article, we'll focus on our selection of loft beds called the Olle. These sturdy boards are made of cold rolled galvanized steel with a metallic coating consisting of aluminium and zinc.
There are many options for Olle garden bed colors and also many different models, we chose 32" Tall, 12-in-1 Galvanized Raised Garden Bed, Sage Green.
Here are the tools we use to build these beds faster.
8mm box wrench (closed)
Philips Head Cordless Drill
Scissors
two hands
Step 1: Lay out materials
Spread out all panels and remove plastic wrap. There's also a thin layer of plastic on the ends, don't miss it.
We separate screws and nuts by category. Not required, but nice to stay organized.
Step 2: Assemble the Plate
First start assembling the slab. Use your hands to twist the nuts five times on each board. Set the finished panel aside.
Step 3: Assemble the Round Panel
Attach the remaining flat panel to the round panel with screws. Make sure the round panel is on the outside.
We started screwing the panels together without reading the instructions carefully at first. too excited. We installed some flat panels inside and others on the outside of the circular panels.
When fixing the round panel to the flat panel, make sure that the round panel is on the outside. Regarding the distribution of weight.
I have warned you.
Step 4: Tighten the Screws
This is where it gets really interesting. Using an 8mm box wrench (closed) to hold the nut, we used a cordless drill with a Phillips bit to tighten the screw.
until all the screws are tightened. This is a very important step!
We used a low torque setting on the drill to avoid over-tightening.
If you've never used a drill before, then I recommend giving it a try. For myself (my husband has been using a power drill), I feel the tool is powerful, fast, and efficient. I understand now why people love power tools!
I told my husband to stop hand tightening the screws and let me go ahead and put the bed in place with the drill. Such fun!
We built three of these beds in total. We originally bought 4 but decided to downsize.
Step 5: Add Safety Rubber Channels
Olle provides a secure rubber channel in the box that protects the edges.
It's easy to put the straps on the edge. The only hard part is where the two groups meet. We had to squeeze the panels together with one hand. Then, carefully place the straps on both panels at the same time.
Once you've wrapped the bed, use scissors or wire cutters to trim off the excess rubber.
That's it!
The garden bed is set up, and the set up garden bed is like a boat.
Land for building gardens and preparing beds
There are a lot of opinions on preparing the ground for raised beds (and any gardening topic, really).
Some say pull up the grass, others say simply place the bed on top of your grass and fill them with soil.
Trust your gut and do what you think works best for your space.
cardboard base
We're going to lay five layers of cardboard first to kill the grass and prevent weeds from growing in the future. If you are using cardboard, remove all labels and plastic tape first. Cardboard will break down into dirt.
Don't buy cardboard. If you live in a densely populated area, people love to shop online. Driving to pick up cardboard boxes on garbage collection days is both economical and environmentally friendly.
Hardware cloth for digging pests
Then we added a layer of hardware cloth. This metal layer prevents burrowing pests from crawling up from our beds. This could destroy crops.
Cut cloth with aviation scissors. We were using gardening gloves and the metal pierced right through the gloves. Be careful when cutting these things.
Then on top of the cardboard and hardware cloth, we placed the garden bed.
change it up a bit
We are concerned that the soil will run out from the bottom of the raised bed.
The layers of cardboard are very uneven. Since the bed is just above, this can be a problem. We know that cardboard takes time to break down.
We need a way to prevent soil seepage.
We consulted a few people and found two ways;
Option 1: Remove all cardboard, leaving the hardware cloth.
Option 2: Put some cardboard and hardware cloth together on the bed.
Considering the 10-minute labor-intensive task of collecting cardboard, we chose option 2. Don't want to waste our wealth.
How to Fill a Raised Garden Bed with Soil
After you've made the beds in your desired garden location, what will you fill them with next?
They say fill them with dirt. what soil? Soil from the ground? maybe not
Step 1: Fill Your Bed with Topsoil
Soil Quick Course
Topsoil is the top layer of the ground. What has been found at the bottom is bedrock. "Bedrock is thought to be solid rock that forms in situ and is the foundation of an area. It will be the bottom layer, on top of which soil development takes place."
Soil composition:
–25% air
–25% water
–45% mineral particles (calcium, manganese, phosphorus) from bedrock with broken roots)
–5% organic matter (living organisms, roots, decaying matter)
Step 2: Place 2 inches of compost on your garden bed
We want to put 2 inches of compost on each raised bed to add nutrients that the topsoil doesn't have. This helps our plants grow better.
Step 3: Add Nutrients and Improvers
Finally, sprinkle with pure organic worm castings. This is pure worm feces digested from a special worm feed. Just like it sounds, it looks like black piss from a worm. Look again for OMRI listed products.
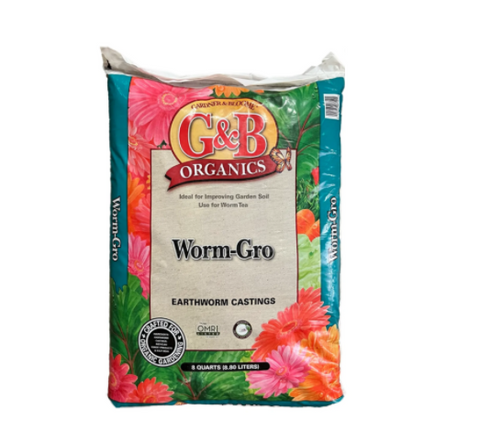
Plants that use up to 10 percent worm castings in their planting beds have been shown to reduce disease and reduce pests.
Every manufacturer is different. Read the directions on the bag, it will tell you how much you can use for the size of the loft bed.
It's not necessary, but you can also add stone powder. This is earth minerals from volcanoes. Use only a small amount. Check the manufacturer's instructions.
Step 4: Mix the Ingredients
Use a rake to spread out all materials. It is not necessary to mix everything into the soil.
Finally, spray water over the bed and walk back and forth on the bed to get everything wet.
Pro tips to save water and time.
Add soil, compost and worm castings to the raised bed before rain. Let nature do her thing.
Summary: Fill the bed with soil
Step 1: Fill Your Bed with Topsoil
Step 2: Spread 2 inches of compost over your garden bed for added nutrients. Look for OMRI-listed compost or products that display "corrected" organically added (the ingredients will say compost)
Step 3: Add nutrients and amendments (other than compost) such as pure worm castings.
final thoughts
This is an interesting project. When we put the Birdies bed in front, people nearby stopped to chat with us.
They will ask what we are building. These beds don't look very traditional.
We'd tell them about raised beds for growing vegetables and herbs. Then we'll hear stories of their own garden or a neighbor's garden.
We overheard a woman say to her friend, "It's great to see people building gardens here." She even said that it means we all need to try to build our own gardens, so this is in our community more common.
Compare that to another neighbor from the Pacific Northwest. She said every home has a front yard garden. Seeing people planting all sorts of things up front, it's normal for neighbors to share the harvest with each other.
Do you have plans to build a garden this season? How much time do you plan to spend each week looking after it?